Creating Abstract Art with Hip Innovative Studio Boutique


Creating Abstract Art Using Chalk Paint®
My rule of thumb is that when you can't find a piece of artwork that you either love or can afford, make your own! I can already see some of you are doing a double-take right now. Make my own artwork? I haven't stepped foot in an art class in years?! While this may be true, it doesn't mean that the capacity and imagination for creating isn't there. We all have it. This rule of thumb, for creating my own art work is one that I've stuck by for years and for the most part have had good success in. Though there are many artists (such as this one, this one, and this one) that I would love to purchase pieces from; it unfortunately doesn't fit into our family budget at this time. Having a small budget though does not equate to poor design. In fact, its often what makes the design better. When I worked at Sisters Unique, I loved when people walked in who were serious about creating something beautiful but had a small budget. I saw it as a creative challenge. We worked alongside one another to determine where the majority of the budget would go and what we would do with the remainder. More often than not, the majority would go to a piece or two that was going to totally transform the room (i.e. a sofa, rug, or piece of art), propelling the space in the right direction. These pieces were the investment pieces. I often encouraged the client to source the remaining design accents from thrift stores and consignment stores or depending on what we were looking at, to make their own. By having a mix of high-end, vintage, and hand-made items, you end up with a curated space. A space that has life - soul. It wasn't all purchased at the same time from the same store or copied out of a magazine but was pieced together to create something truly one-of-a-kind. That is what we're doing today. We're going to create art!
The art work that I'm showing you how to make today is something that anyone can do, young or old, creative or not. After all, when it comes to abstract art, the more abstract the better, right? I found my inspiration for these pieces from a variety of places: people I follow on Instagram, artists such as Matisse that I admire, and scenes in nature. While in my home, my art work is neutral, the artwork that I made here with my friend Anna Hubbard, is colorful, youthful, and a tad coastal. Anna is my good-friend and client who is owner and founder of Hip Innovative Studio Boutique in Newport News, Virginia. Though she has been running businesses alongside of her husband for years, it had always been her dream of one day owning her own studio and boutique, where she could create and sell her line of jewelry along with local and artisan goods. She now does this and more, operating as the area's local Chalk Paint® stockist and offering a variety of creative Workshops. Both being creatives, we thought that it would be fun to team-up together to produce some helpful content for our readers.
What You'll Need:
Paper
Paint Brush
Cup of Water
Cloth to off-load paint brush
Scissors
Sharpie
Glue Gun + Glue Sticks
Some sort of towel of craft paper
Method:
Lay out a towel or craft paper on the surface in which you are going to be working on.
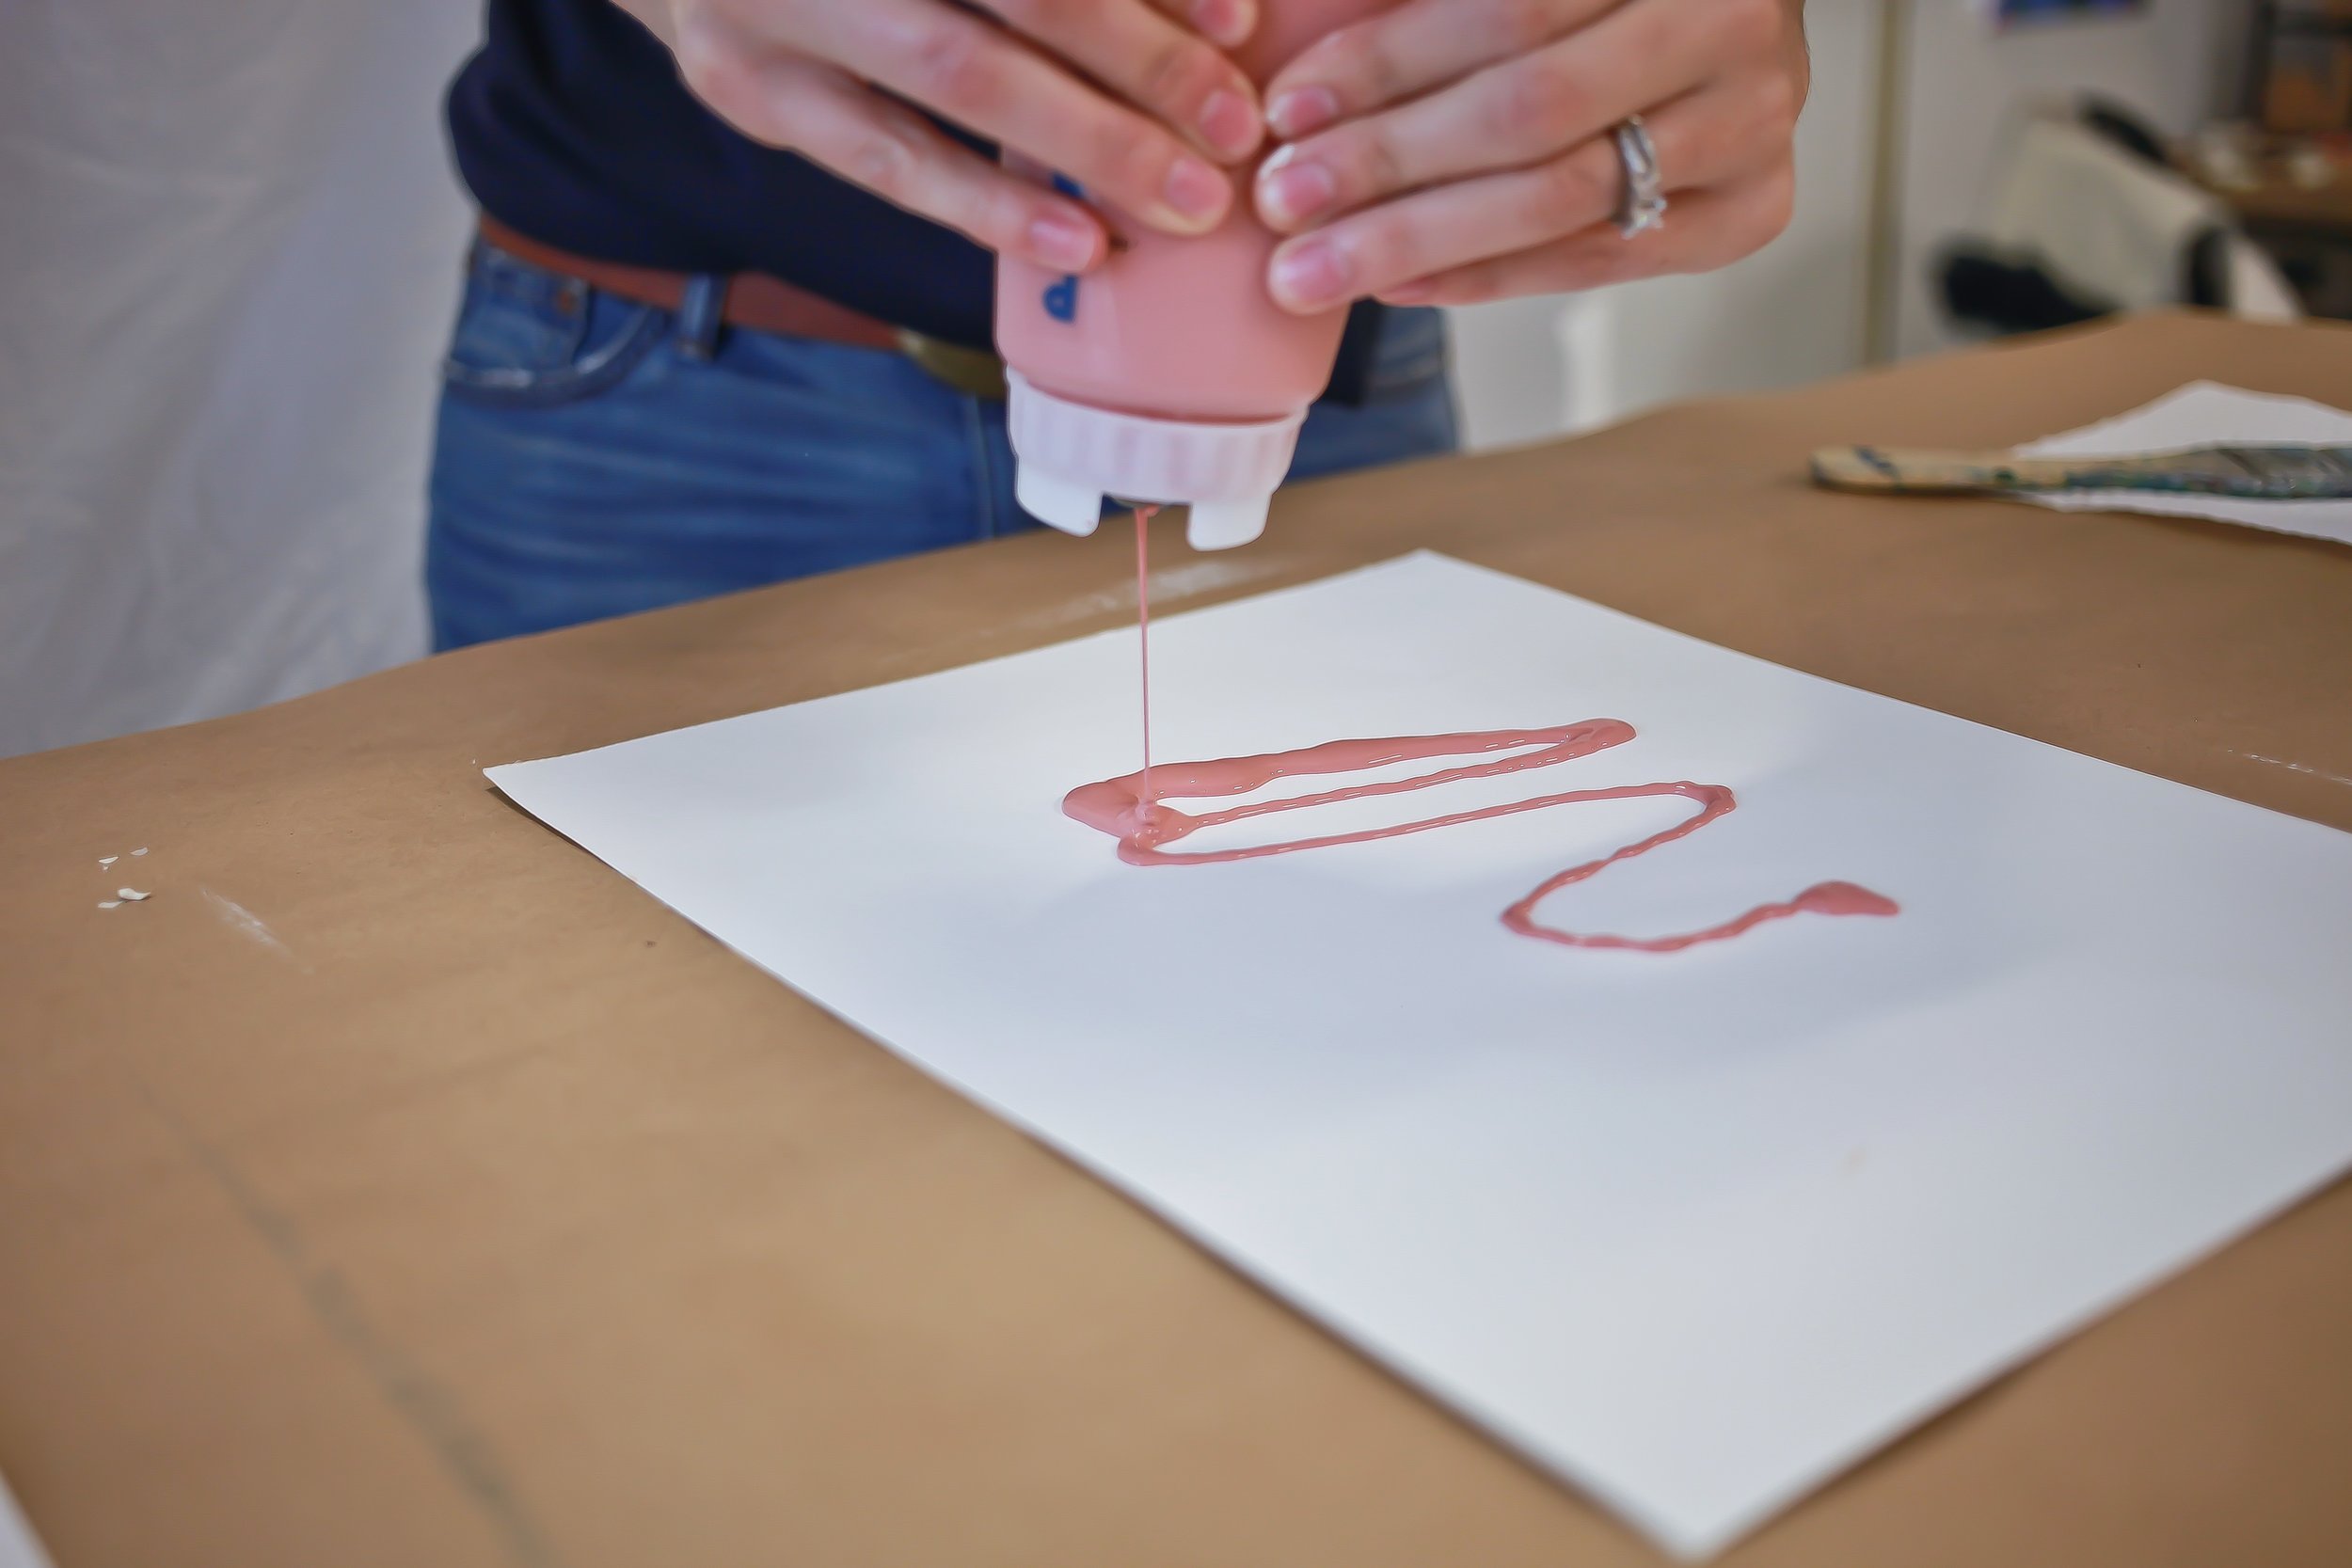
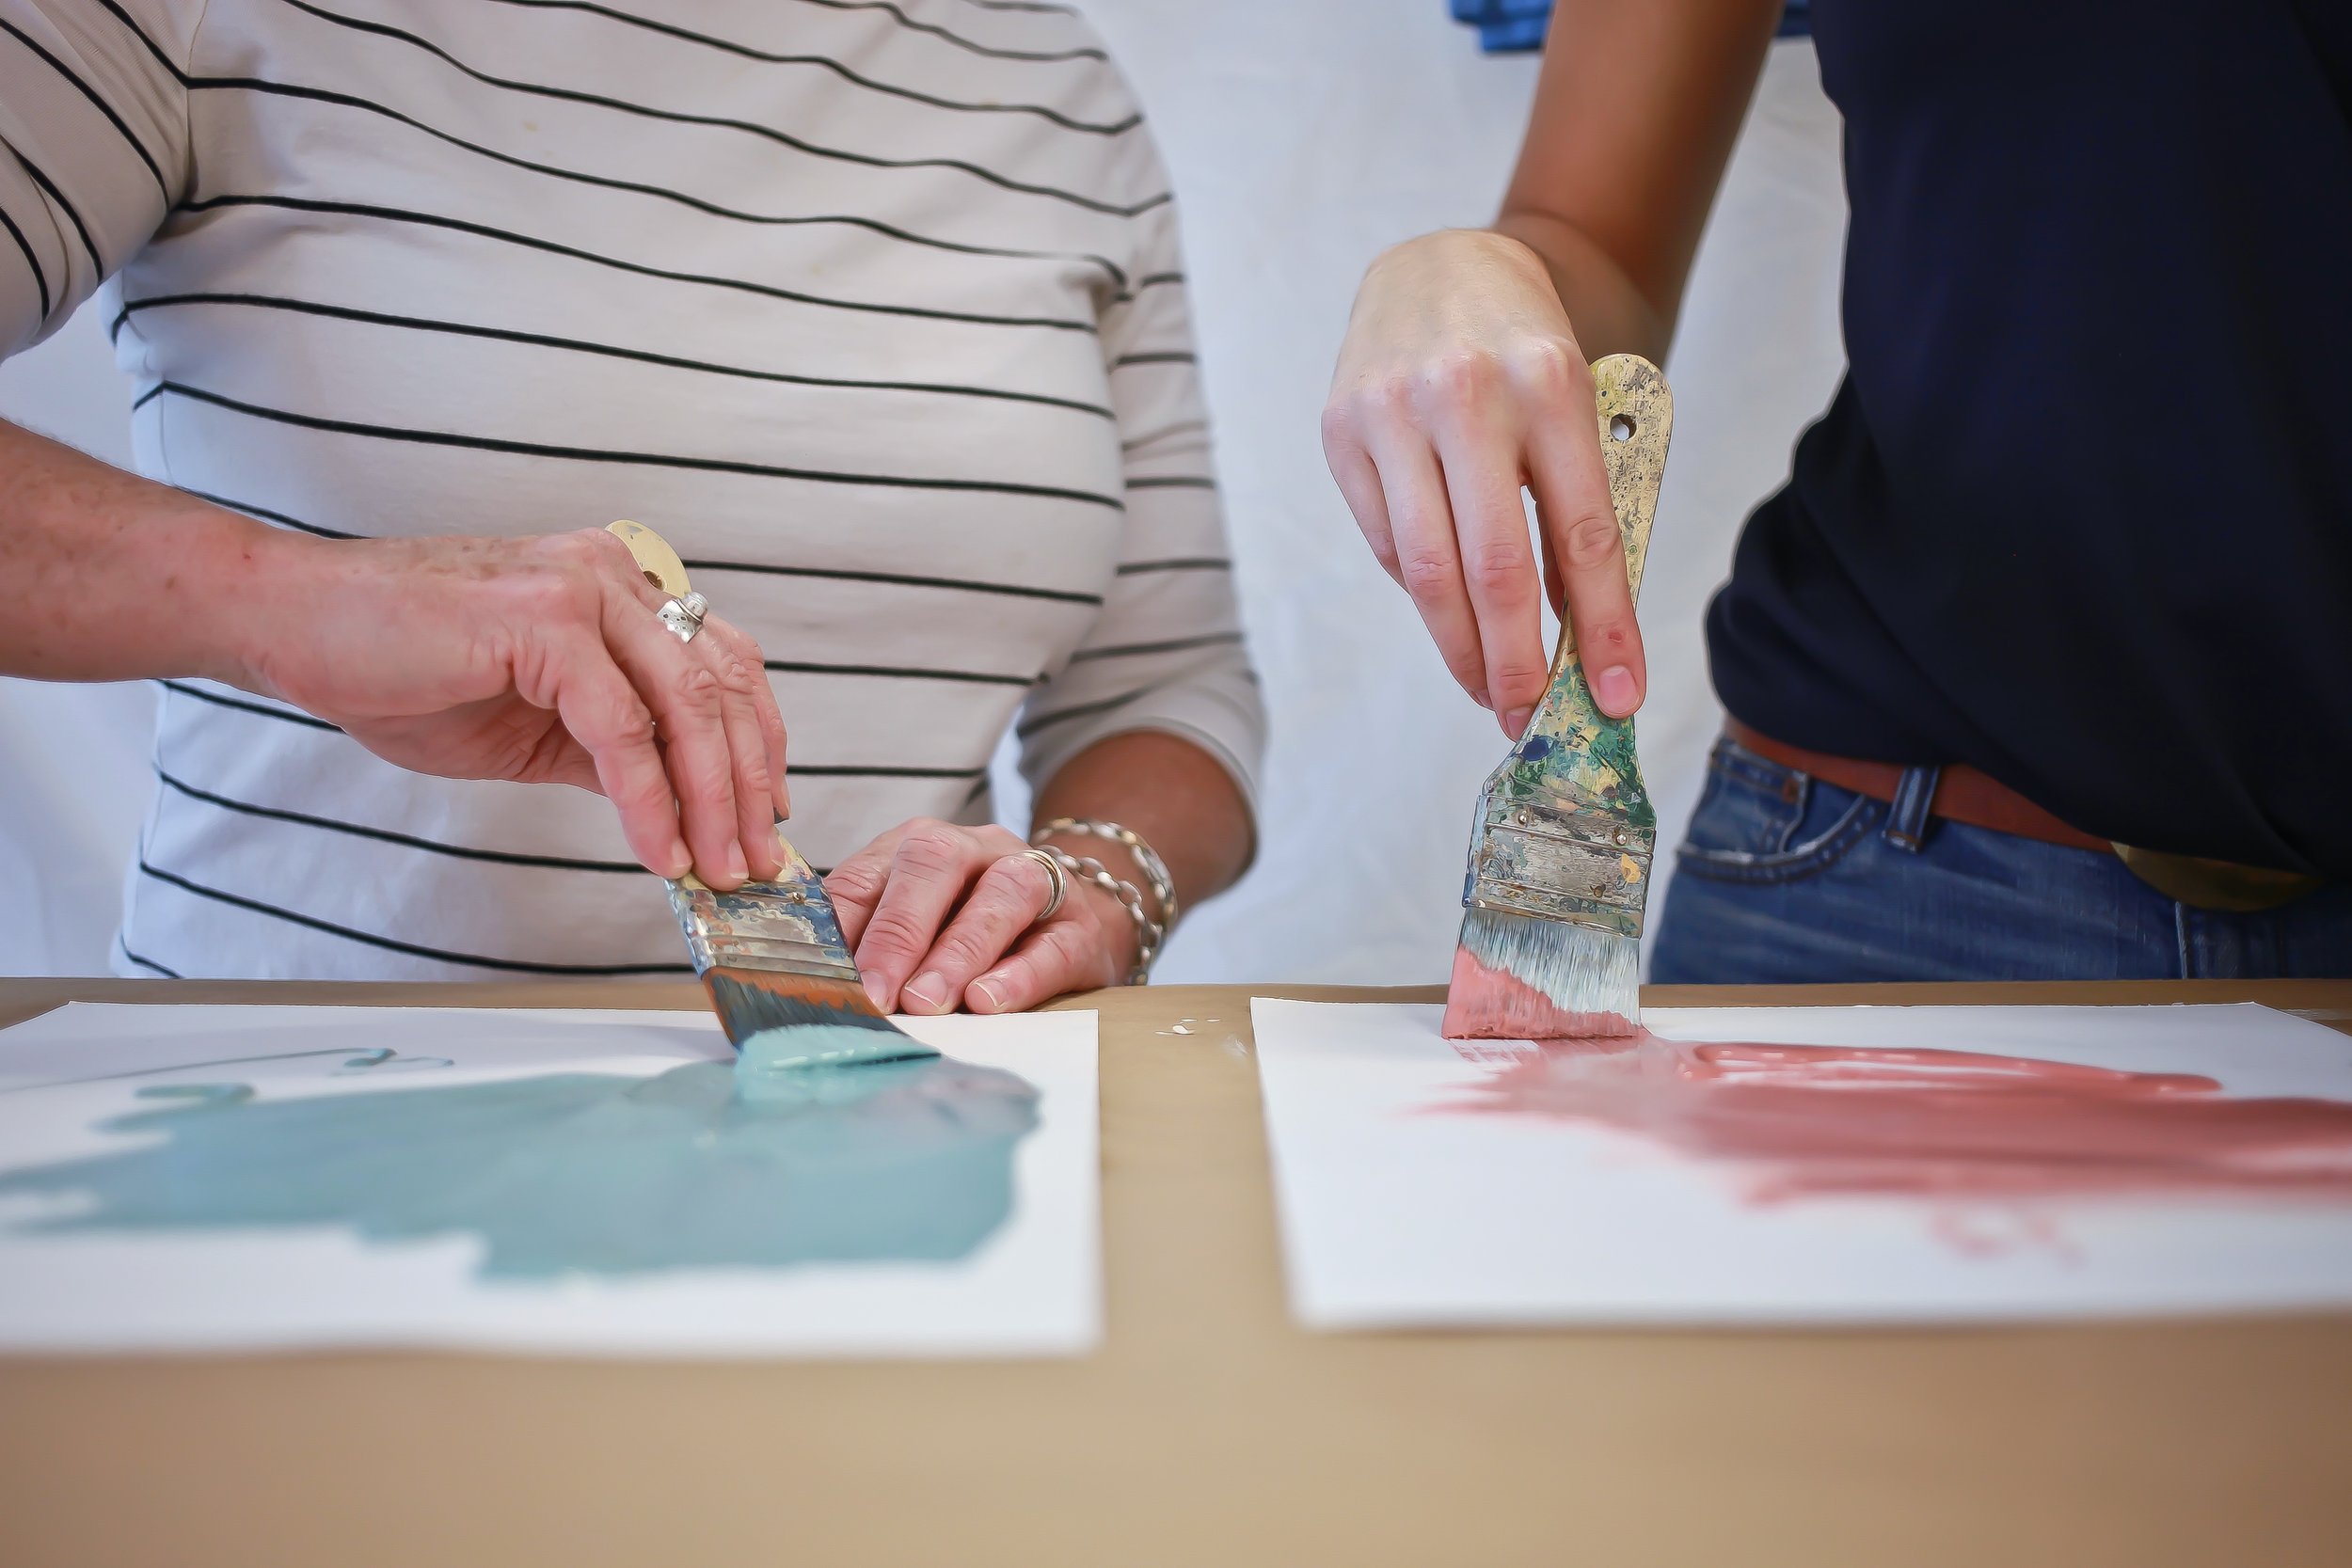
Collect the pieces of paper that you will be using, select one and lay it flat on your surface. Squeeze a little Chalk Paint® on there (not too much , you can always add more) and then dip your paint brush in your cup of water and start moving the paint around; covering the entire sheet of paper. You can go as heavy with the paint as you'd like. Sometimes I desire a plain, saturated background and so I use more paint. When I want to see the brushstrokes and movement, I use less paint.
Paint as many sheets of paper as you'd like with your color before rinsing your brush off and moving on to your next color. Repeat this for all of the Chalk Paint® colors that you plan on using to create your artwork. I tend to use 3-4 when working on pieces such as these.
Allow your sheets of paper to dry. Since your using Chalk Paint® the process should happen fairly quickly.
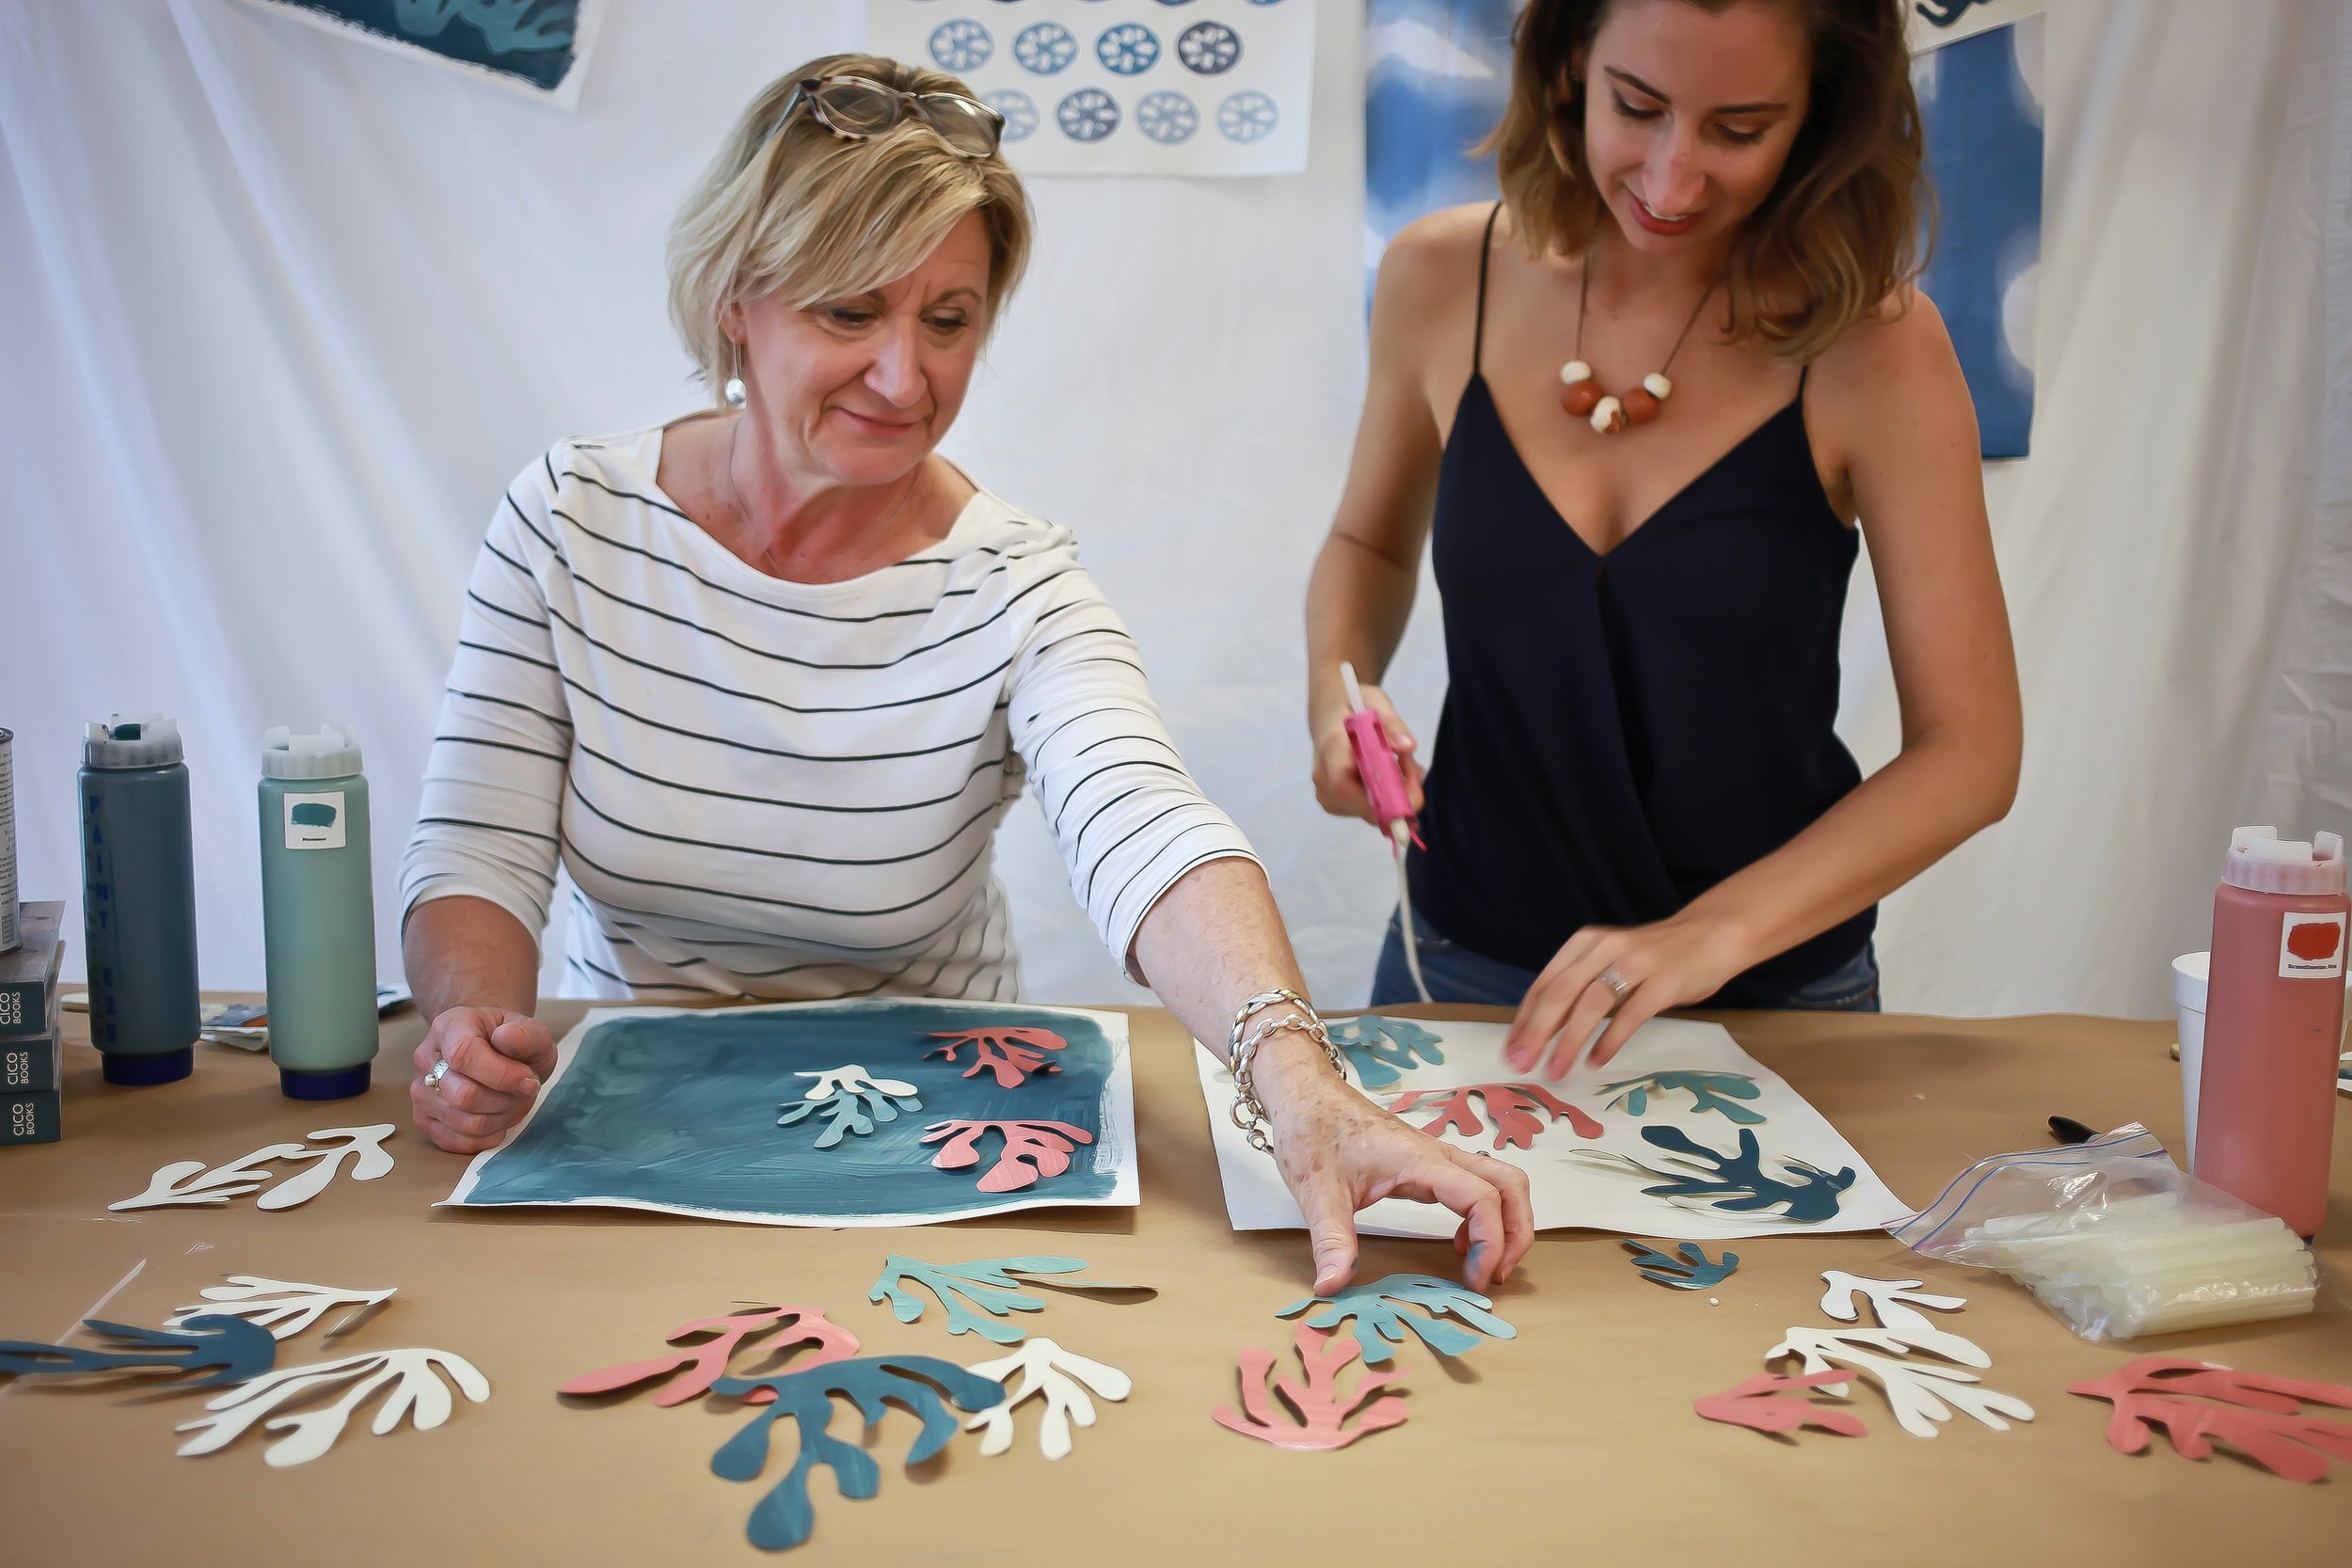
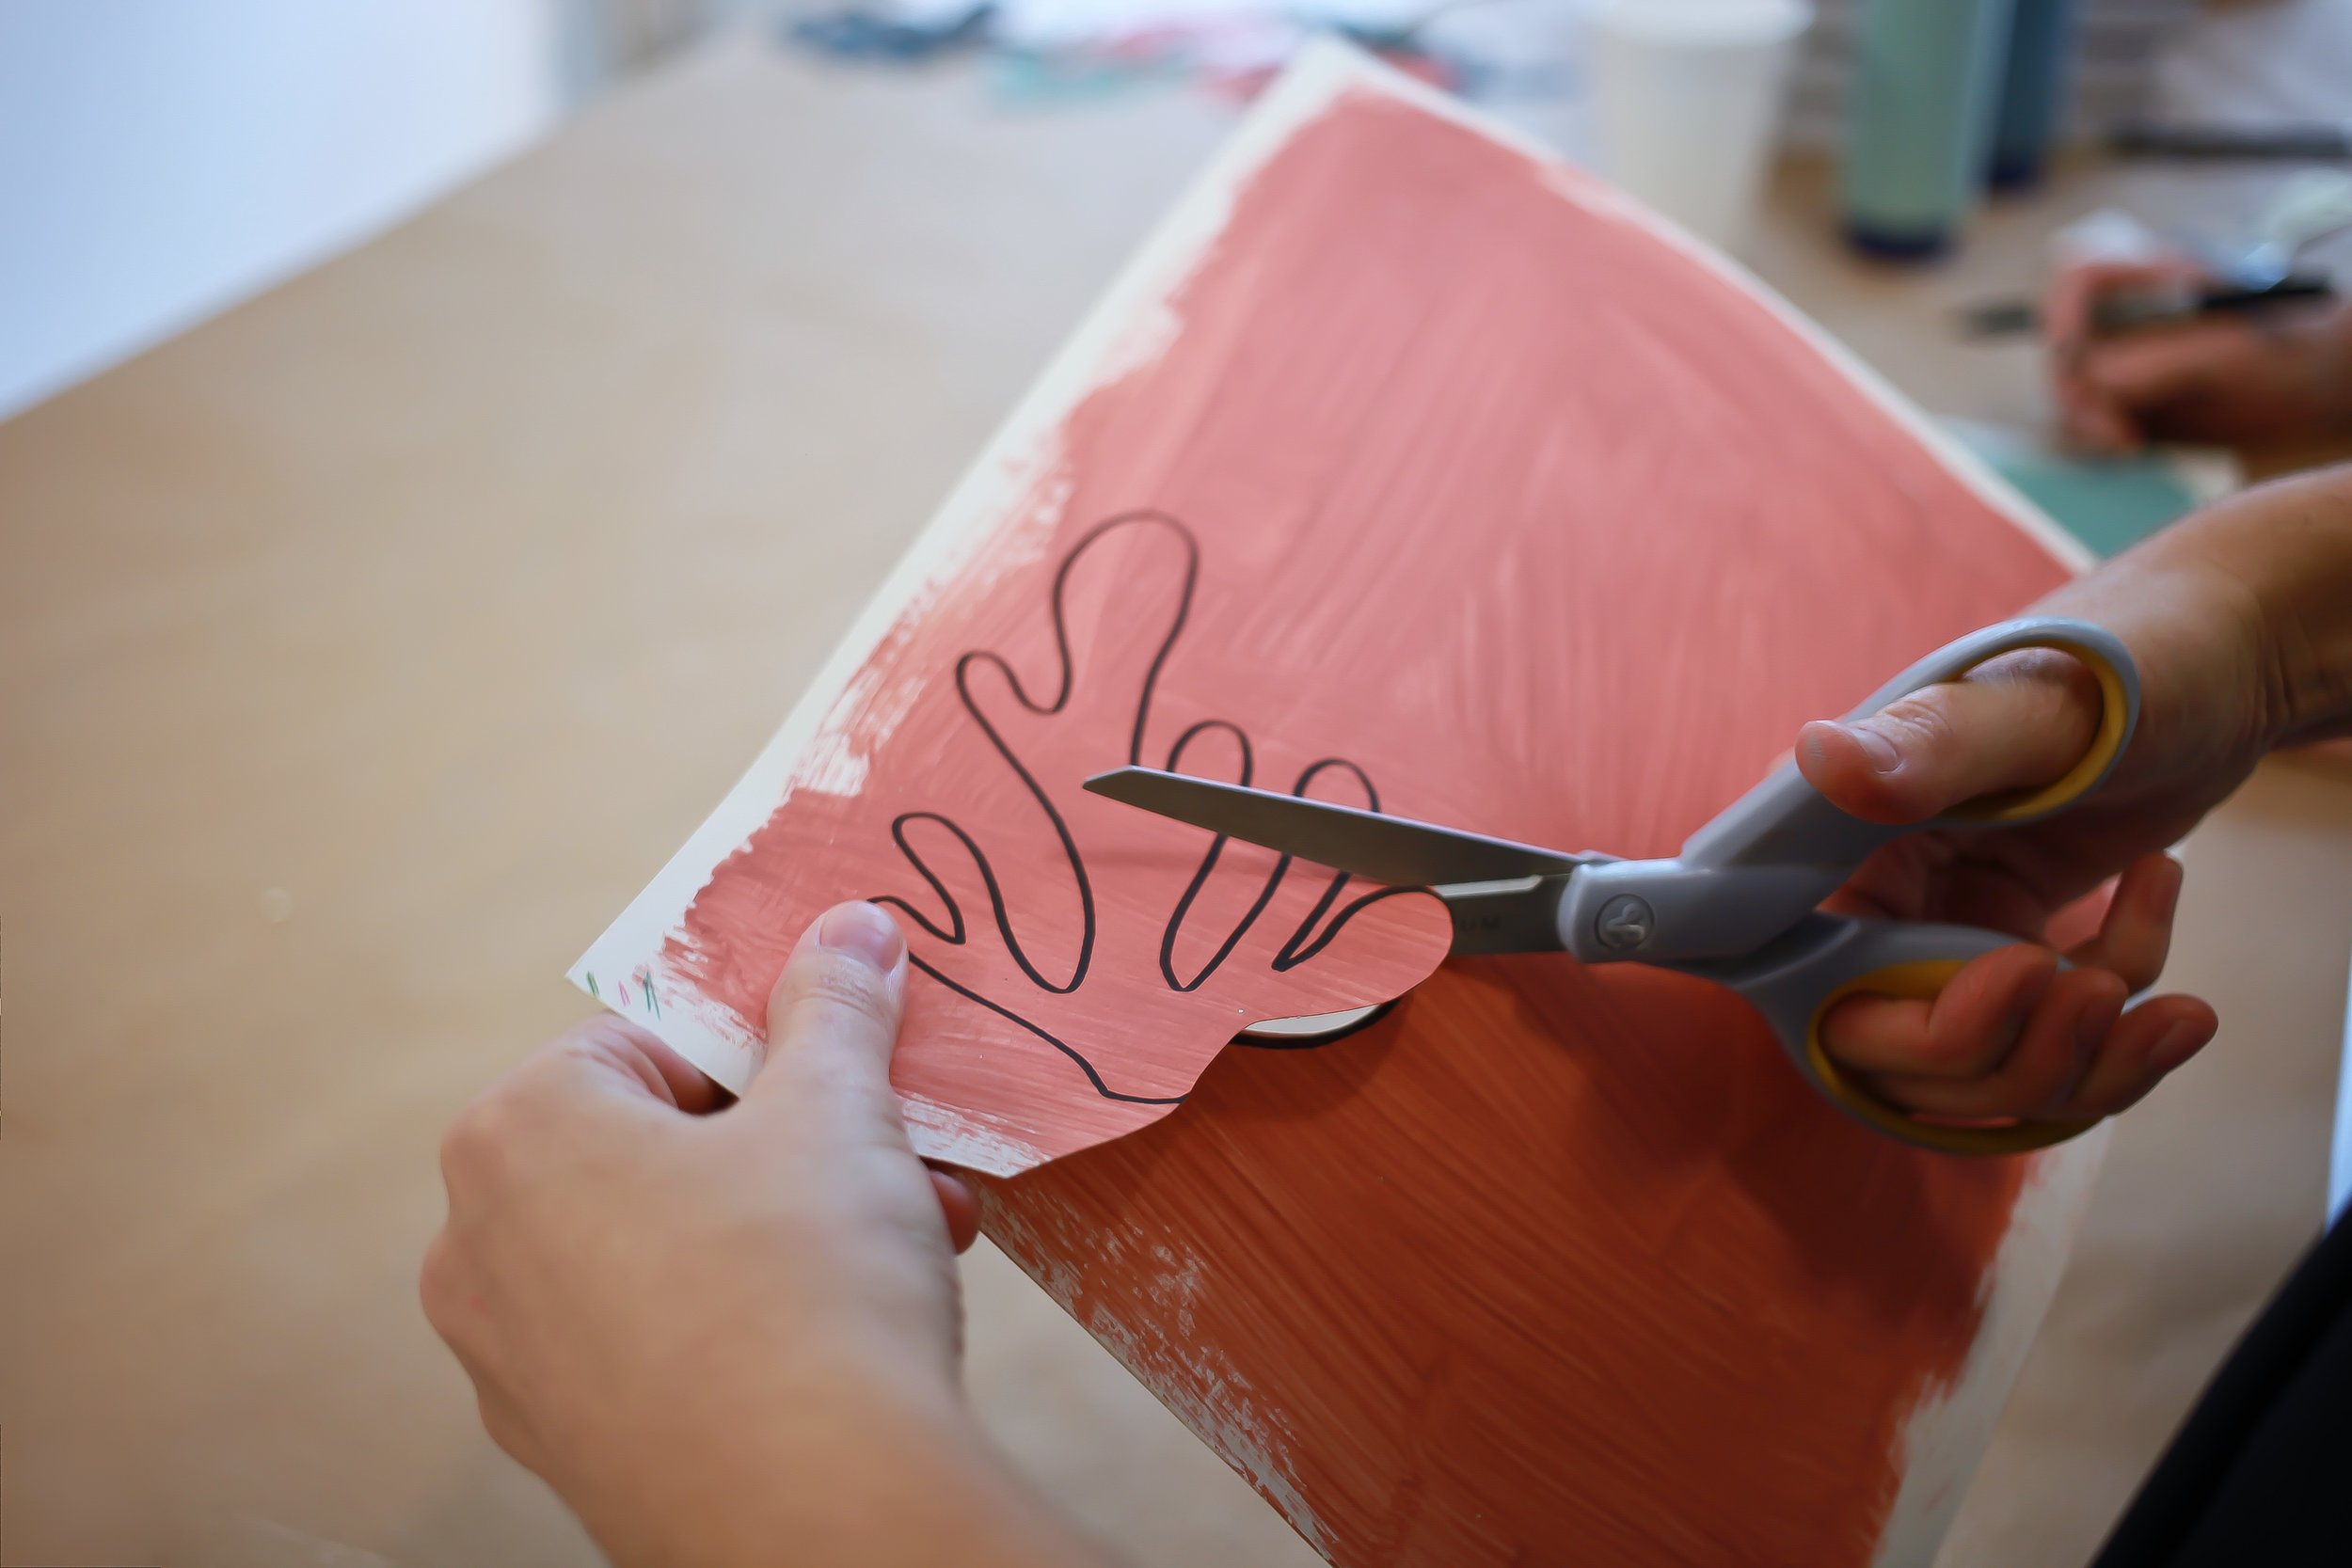
Once your paper is dry, turn it upside down, so that the painted surface is touching your towel/craft paper. Take your sharpie and begin to draw abstract shapes. I am very much inspired by the shapes that Matisse used in his artwork, so I used them as a source of inspiration. There are no rules when it comes to this however I find it more interesting if your shapes vary a bit in size and shape. Do this for all of your sheets of paper minus the ones that you will use as your backdrop.
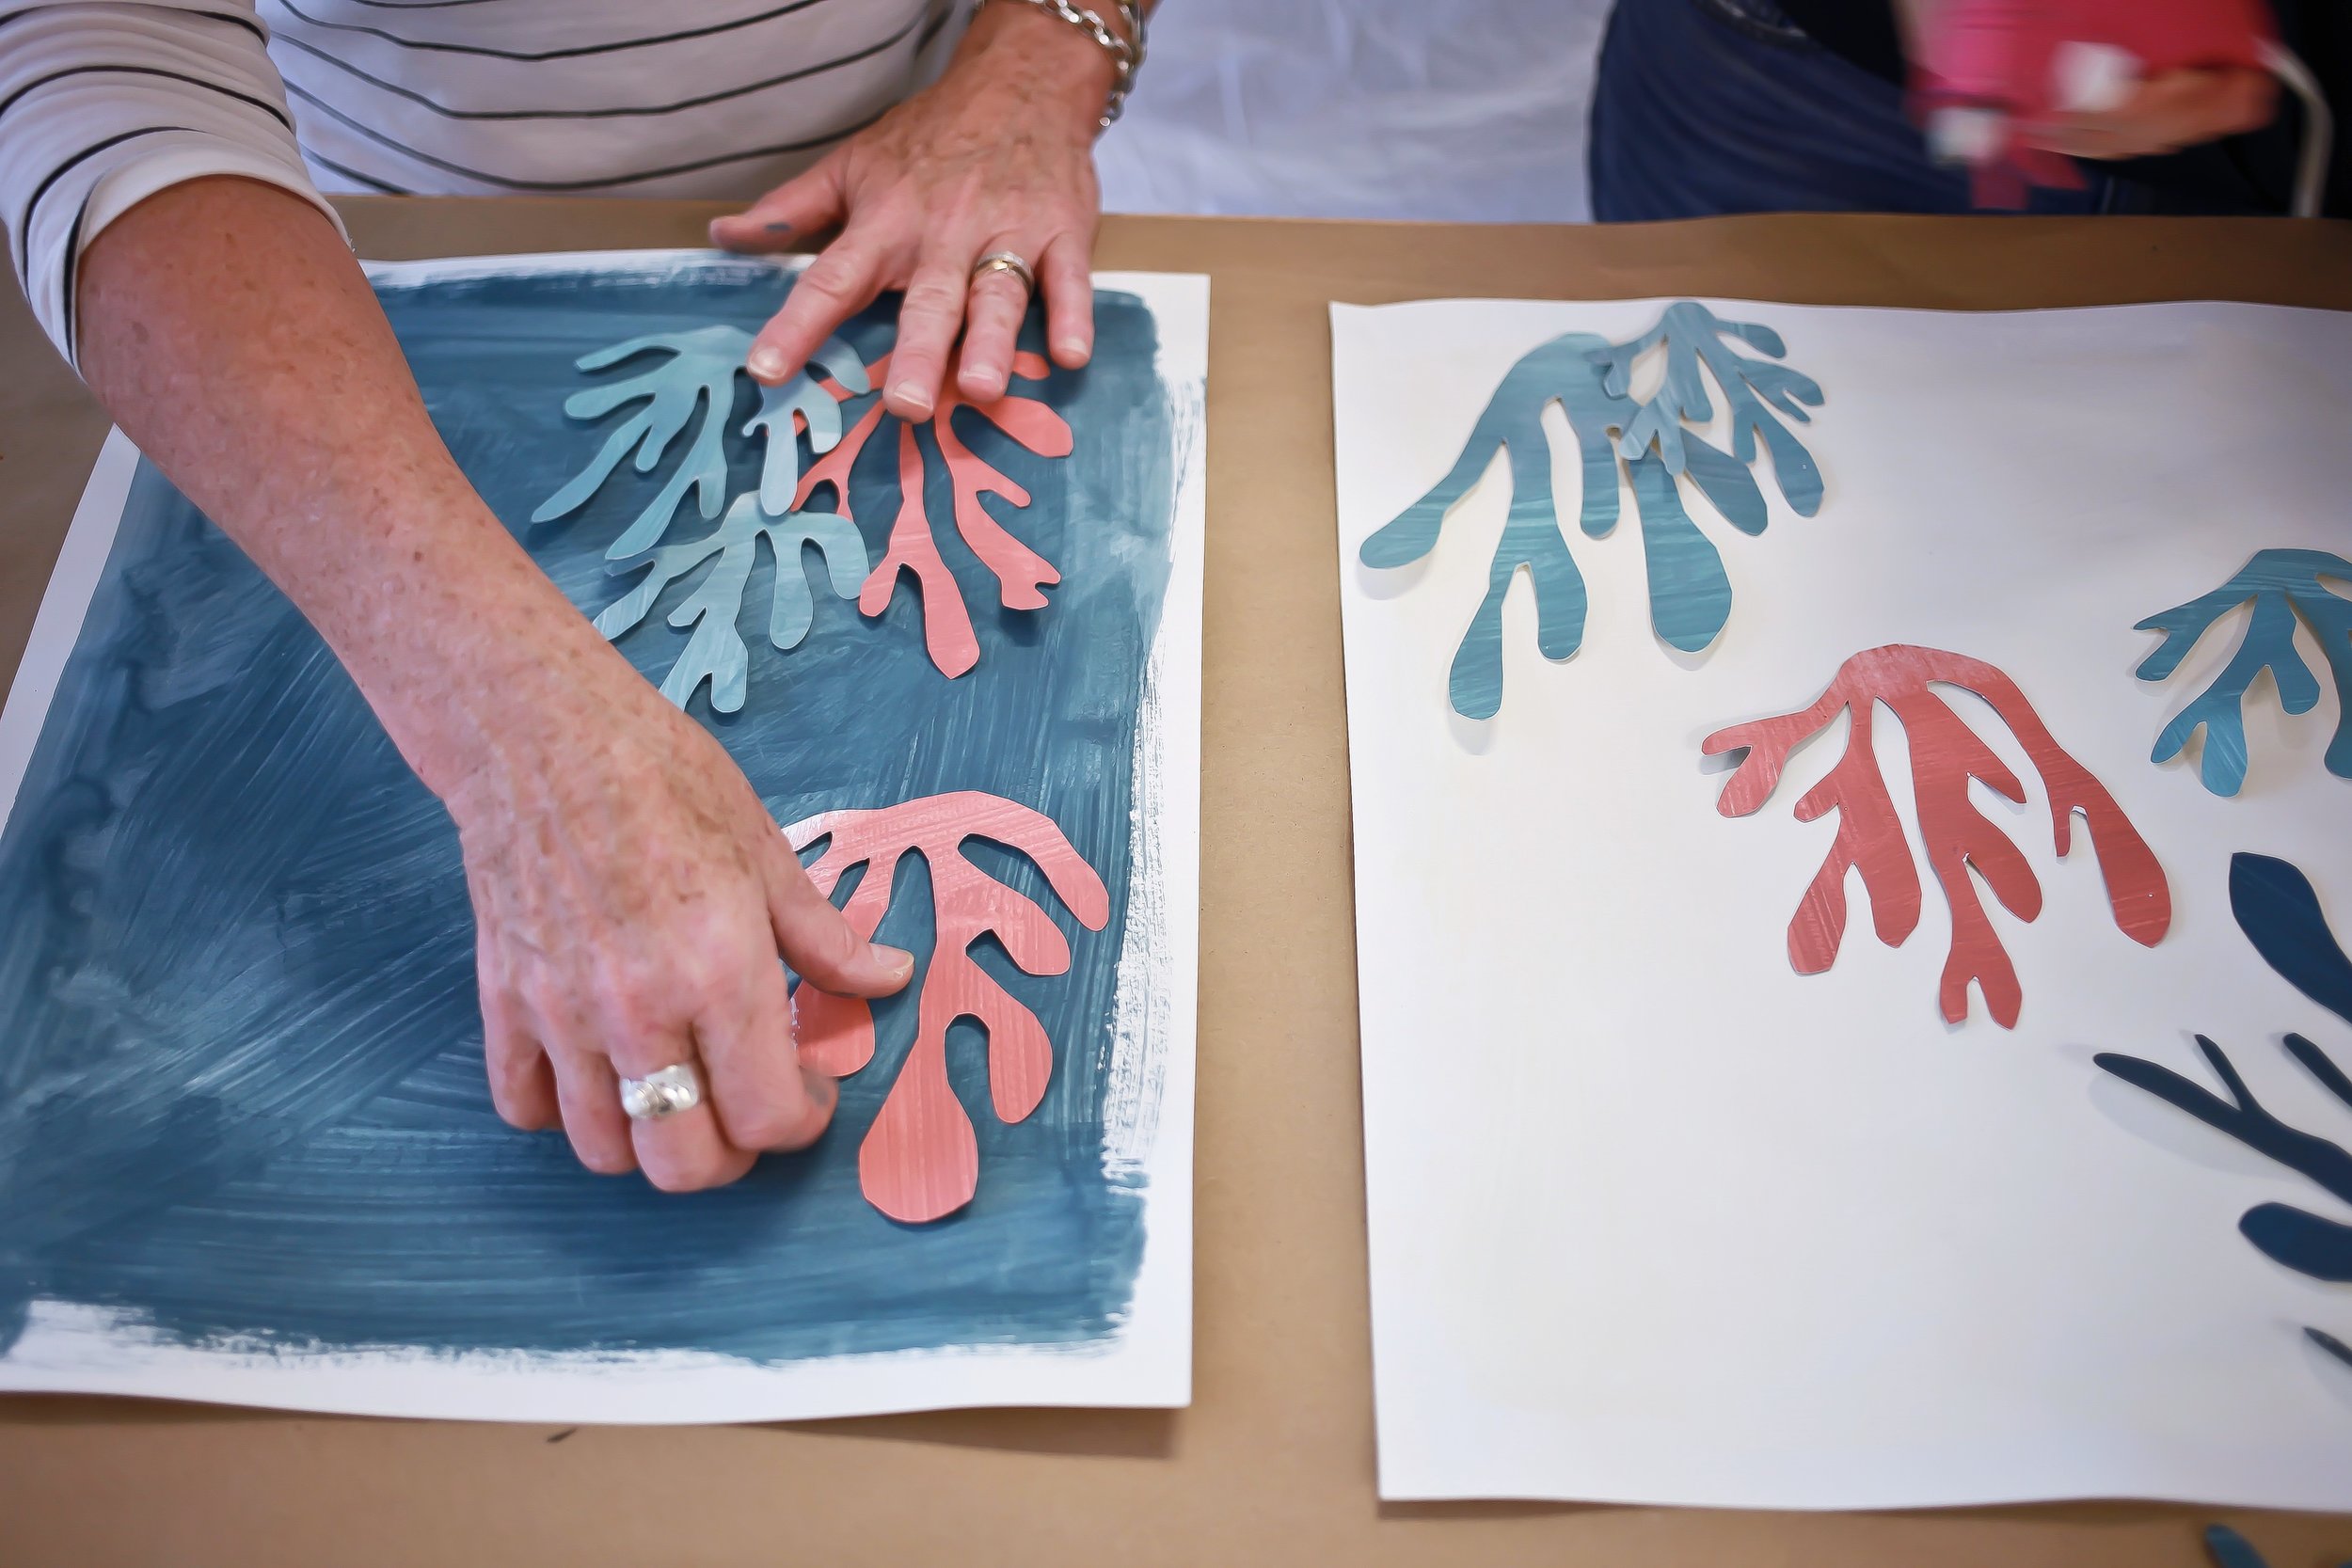
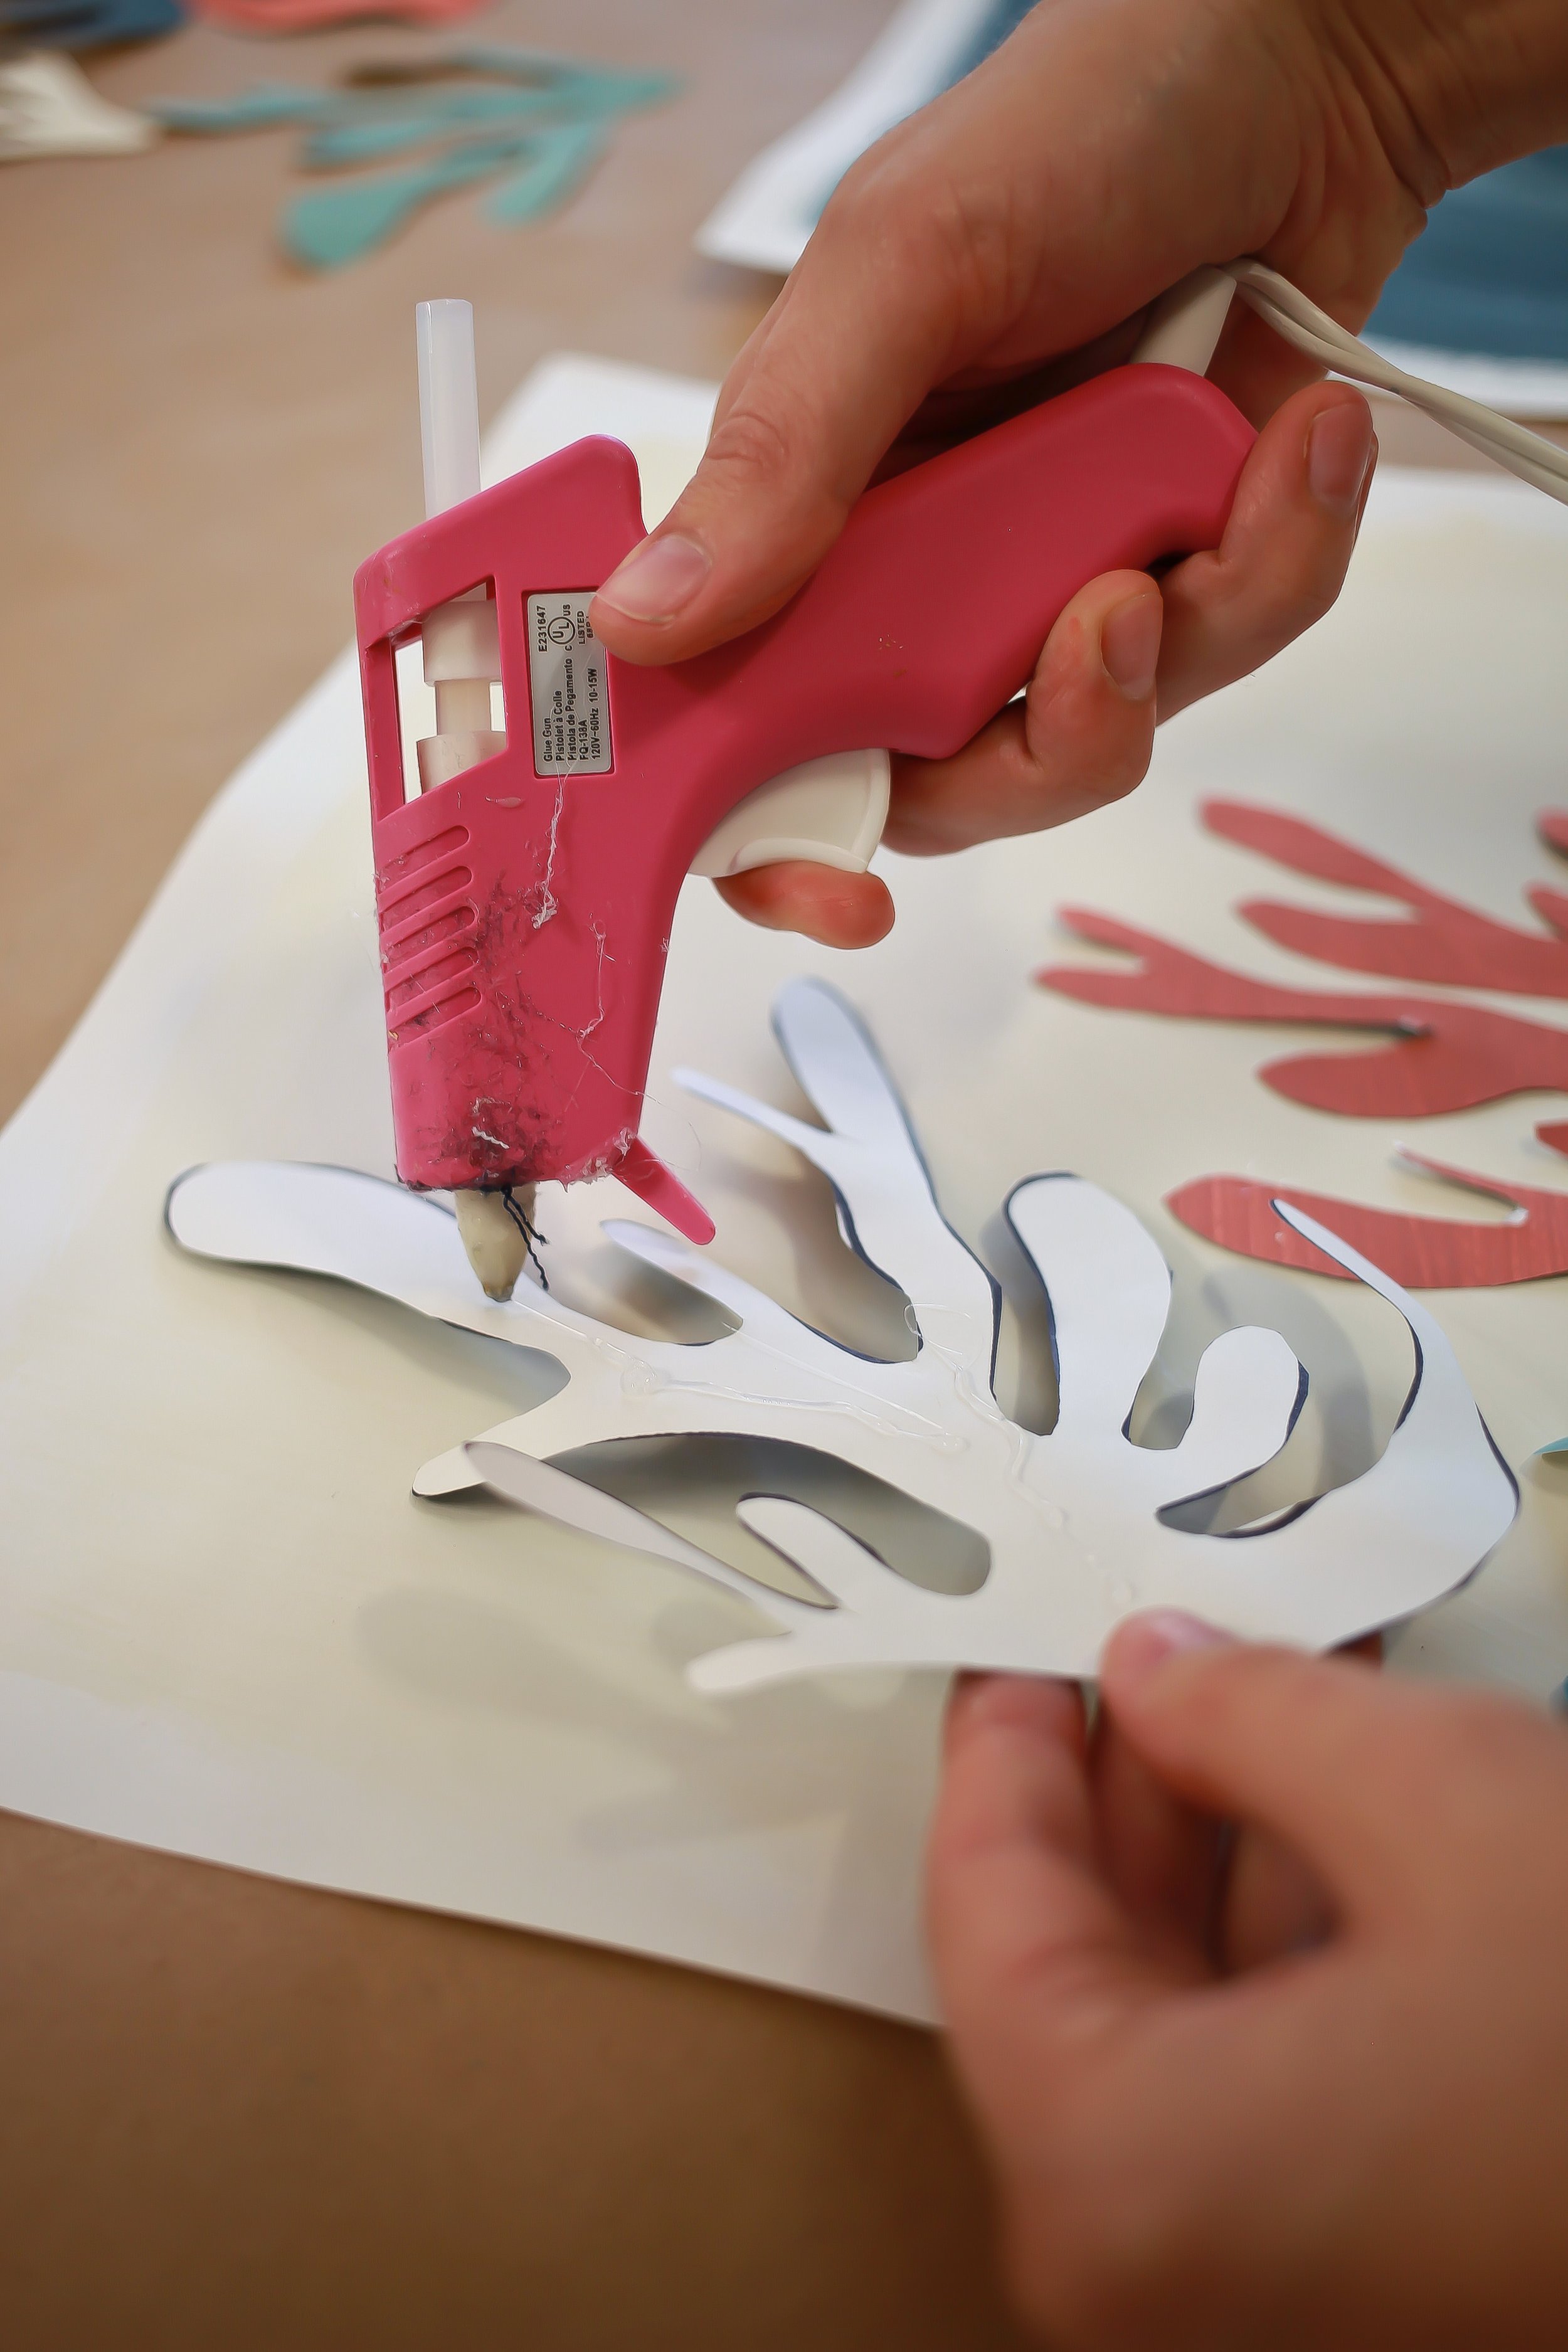
Once you have your shapes cut out, begin to heat up your glue gun. While this is happening, start to arrange your cut-outs on your backdrops. There is no right or wrong here - let loose and get creative!
After you have finished arranging your cut-outs, hot glue them to your backdrops, and voila!


Creating Potato Prints Using Chalk Paint®
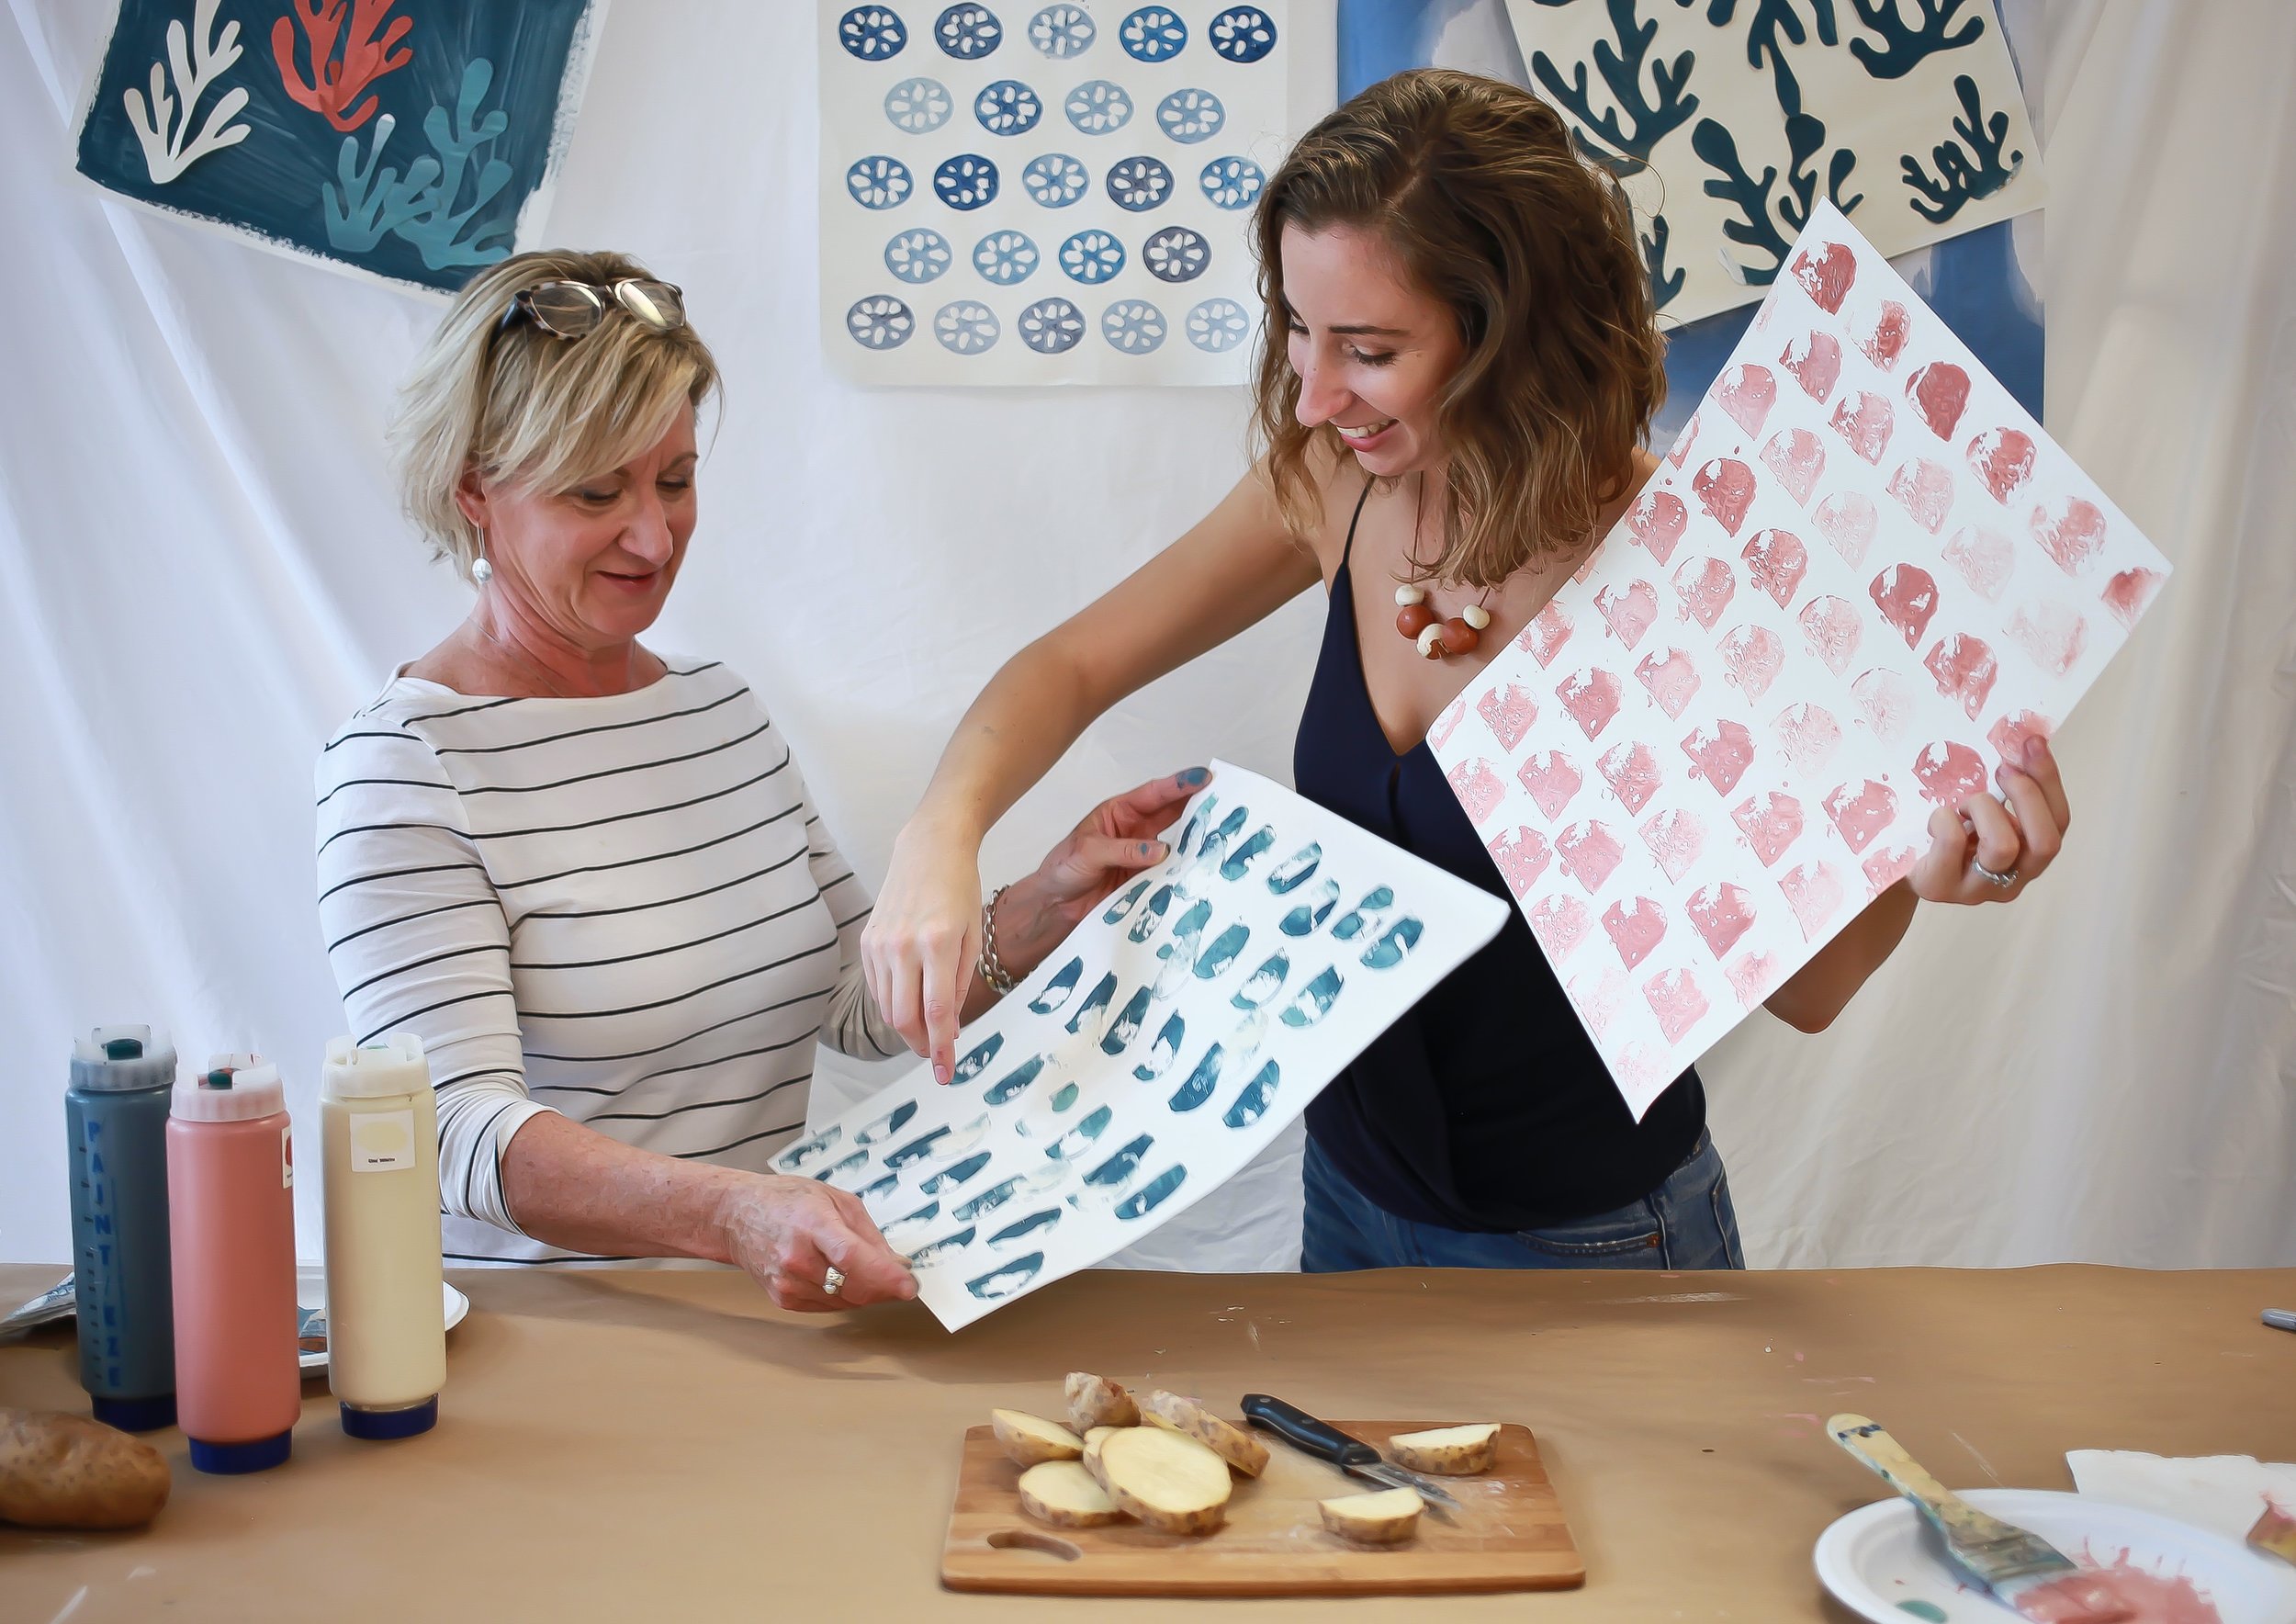
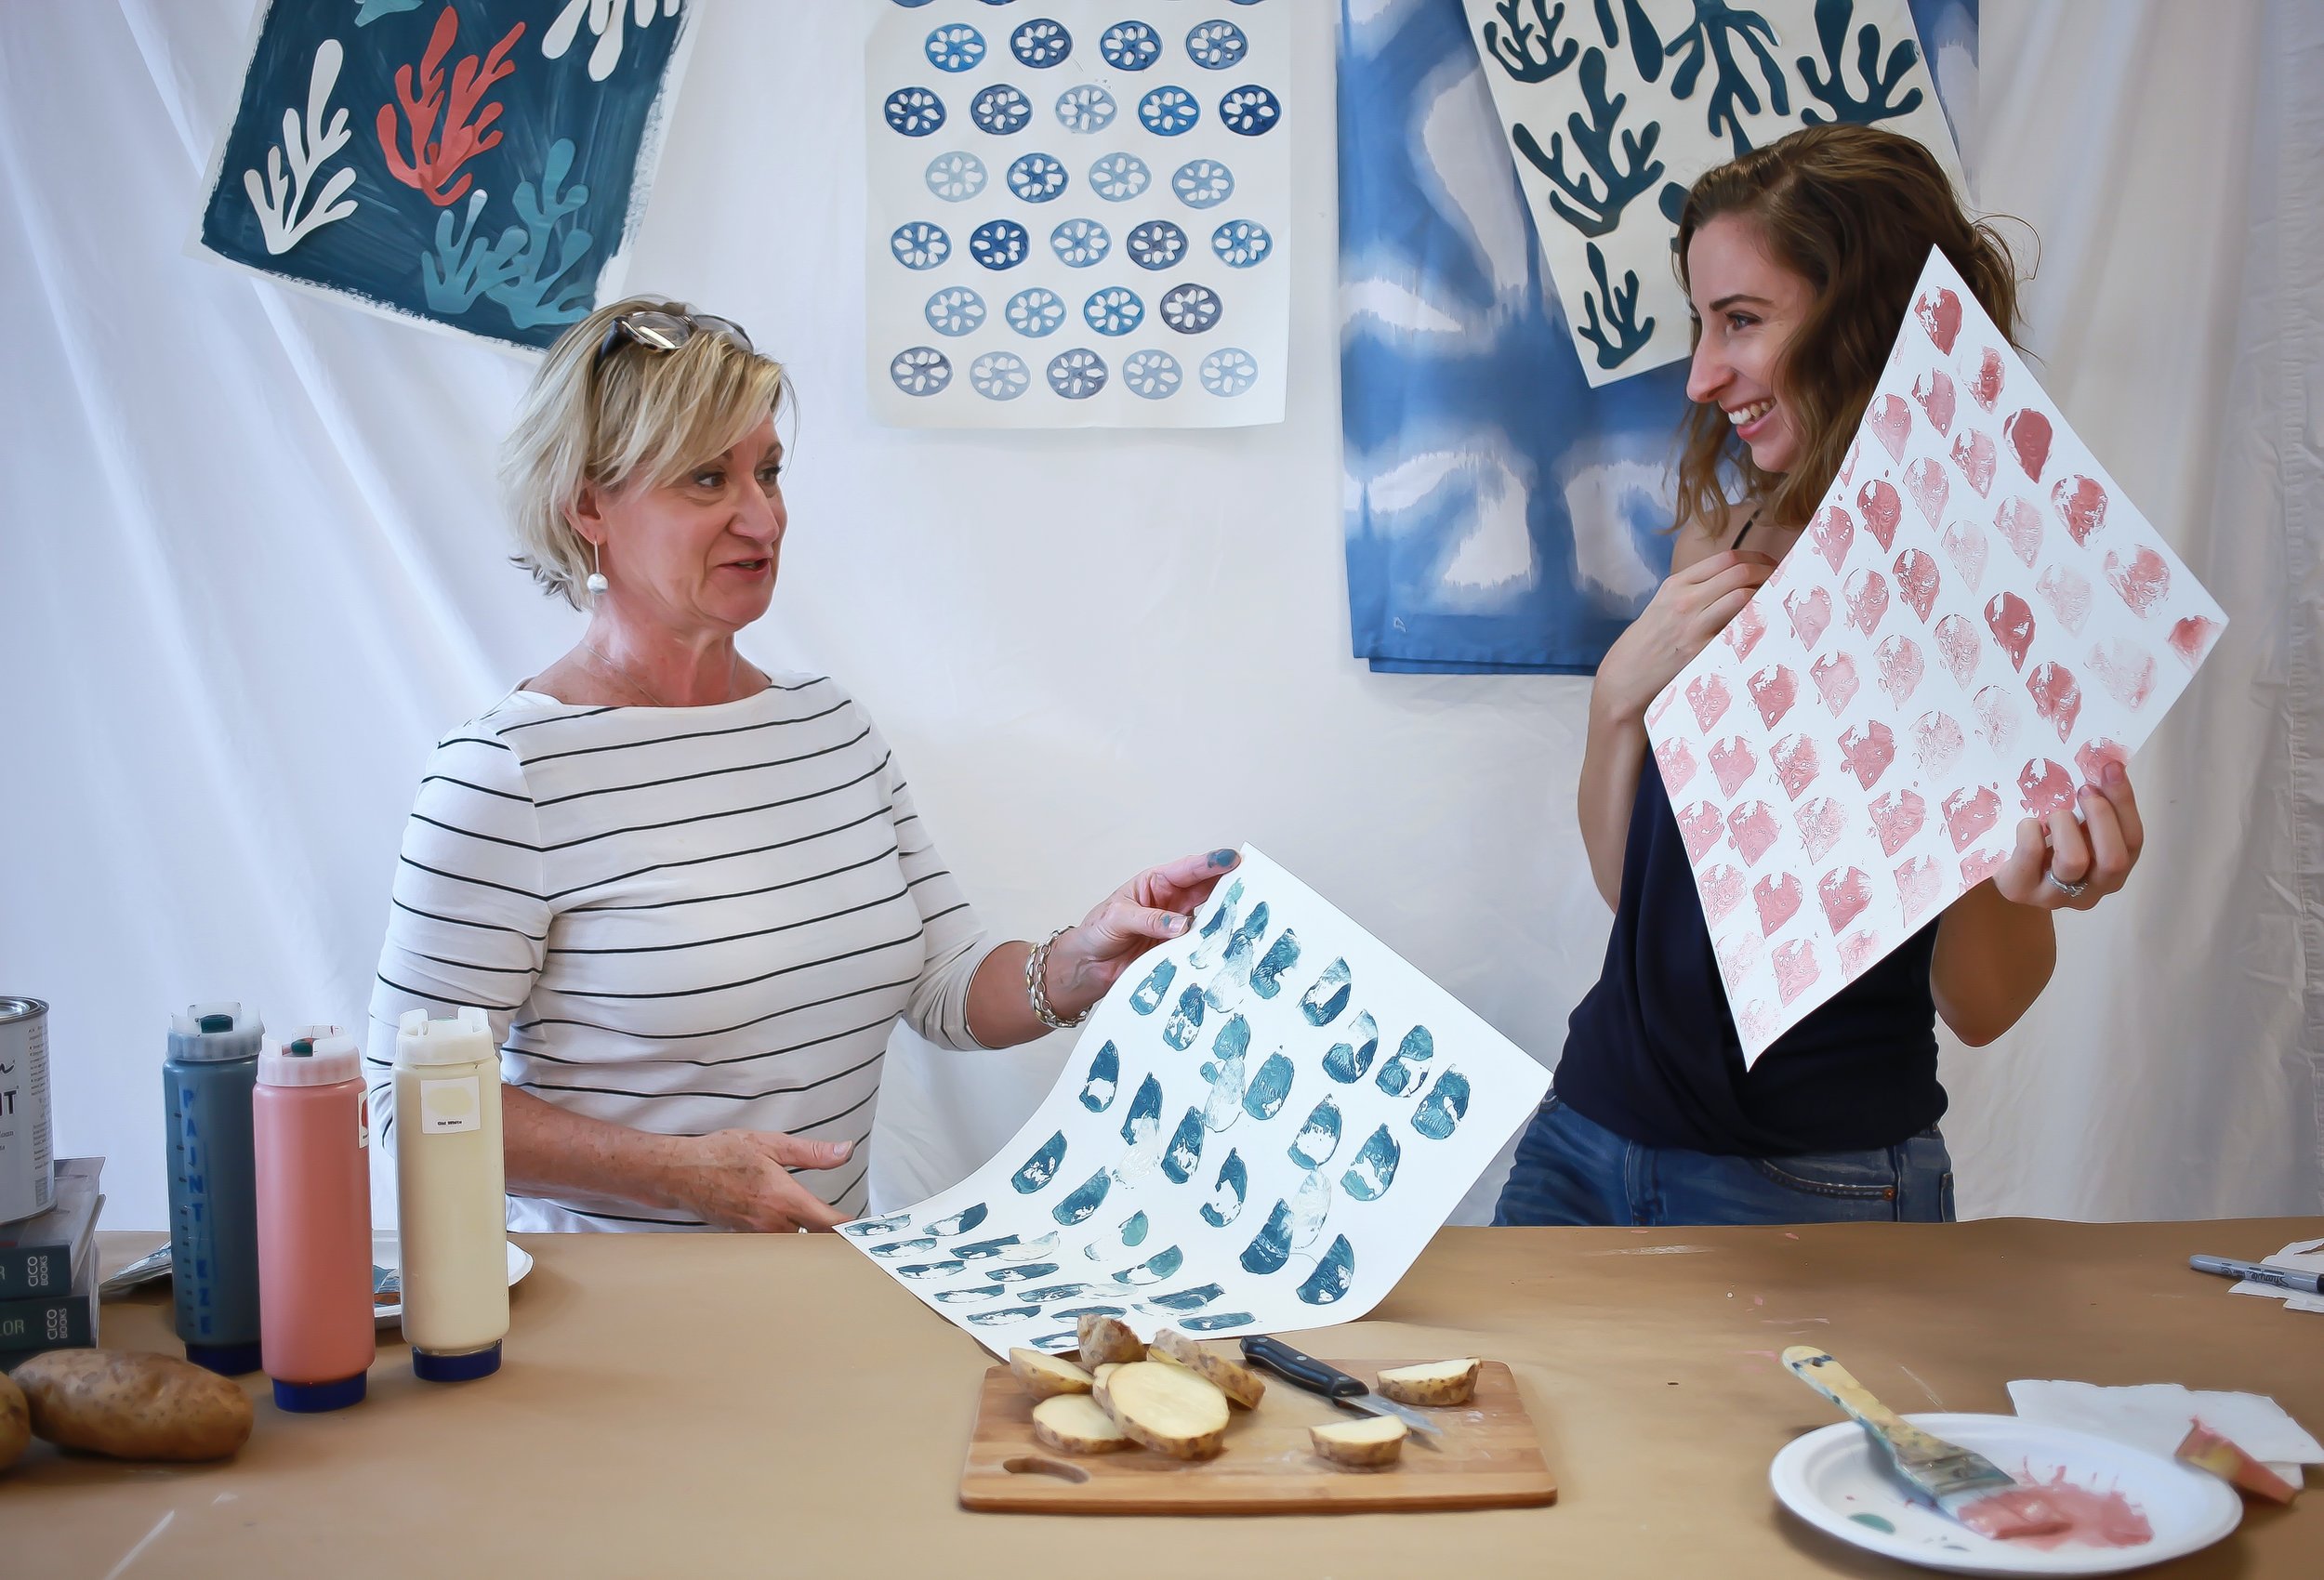
I came across the idea of creating a piece of art using a potato after seeing the beautiful, commissioned piece of artwork that Rebecca Atwood did for interior designer, Emily Henderson. Something about the simplicity of making something so modern and raw using minimal, in-expensive, organic materials was especially appealing as I had been in the process of de-cluttering my art supplies. It gave me re-assurance that I would always be able to create without having boxes filled of supplies. There are materials all around me manufactured and organic, that I can use to create. It wasn't just the minimal materials used that caught my eye, it was also the design. While there are numerous possibilities that you could create using a potato wedge, the rows of varying shades of blue that Rebecca created resulted in a piece of art that could be placed in any home, no matter the style.
Anyone can do this. My friend, Anna Hubbard chuckled when I told her the idea, saying that it was something that she had done in grade-school. You can keep it simple like we did above, or you can get a little wild and chisel in beautiful designs (i.e. the one that is hanging in the background of our set, created by our friend, Renea Suttle). You also don't have to stick with potatoes! Experiment with all sorts of fruits and vegetables. When I was making some samples in Renea's kitchen, she discovered that celery, when chopping the "stems off"- leaving the base, creates a rose-like shape. The possibilities are endless! I'd love to experiment more and try this out on fabric in the future, like Rebecca did, to create a one-of-a-kind wall hanging.
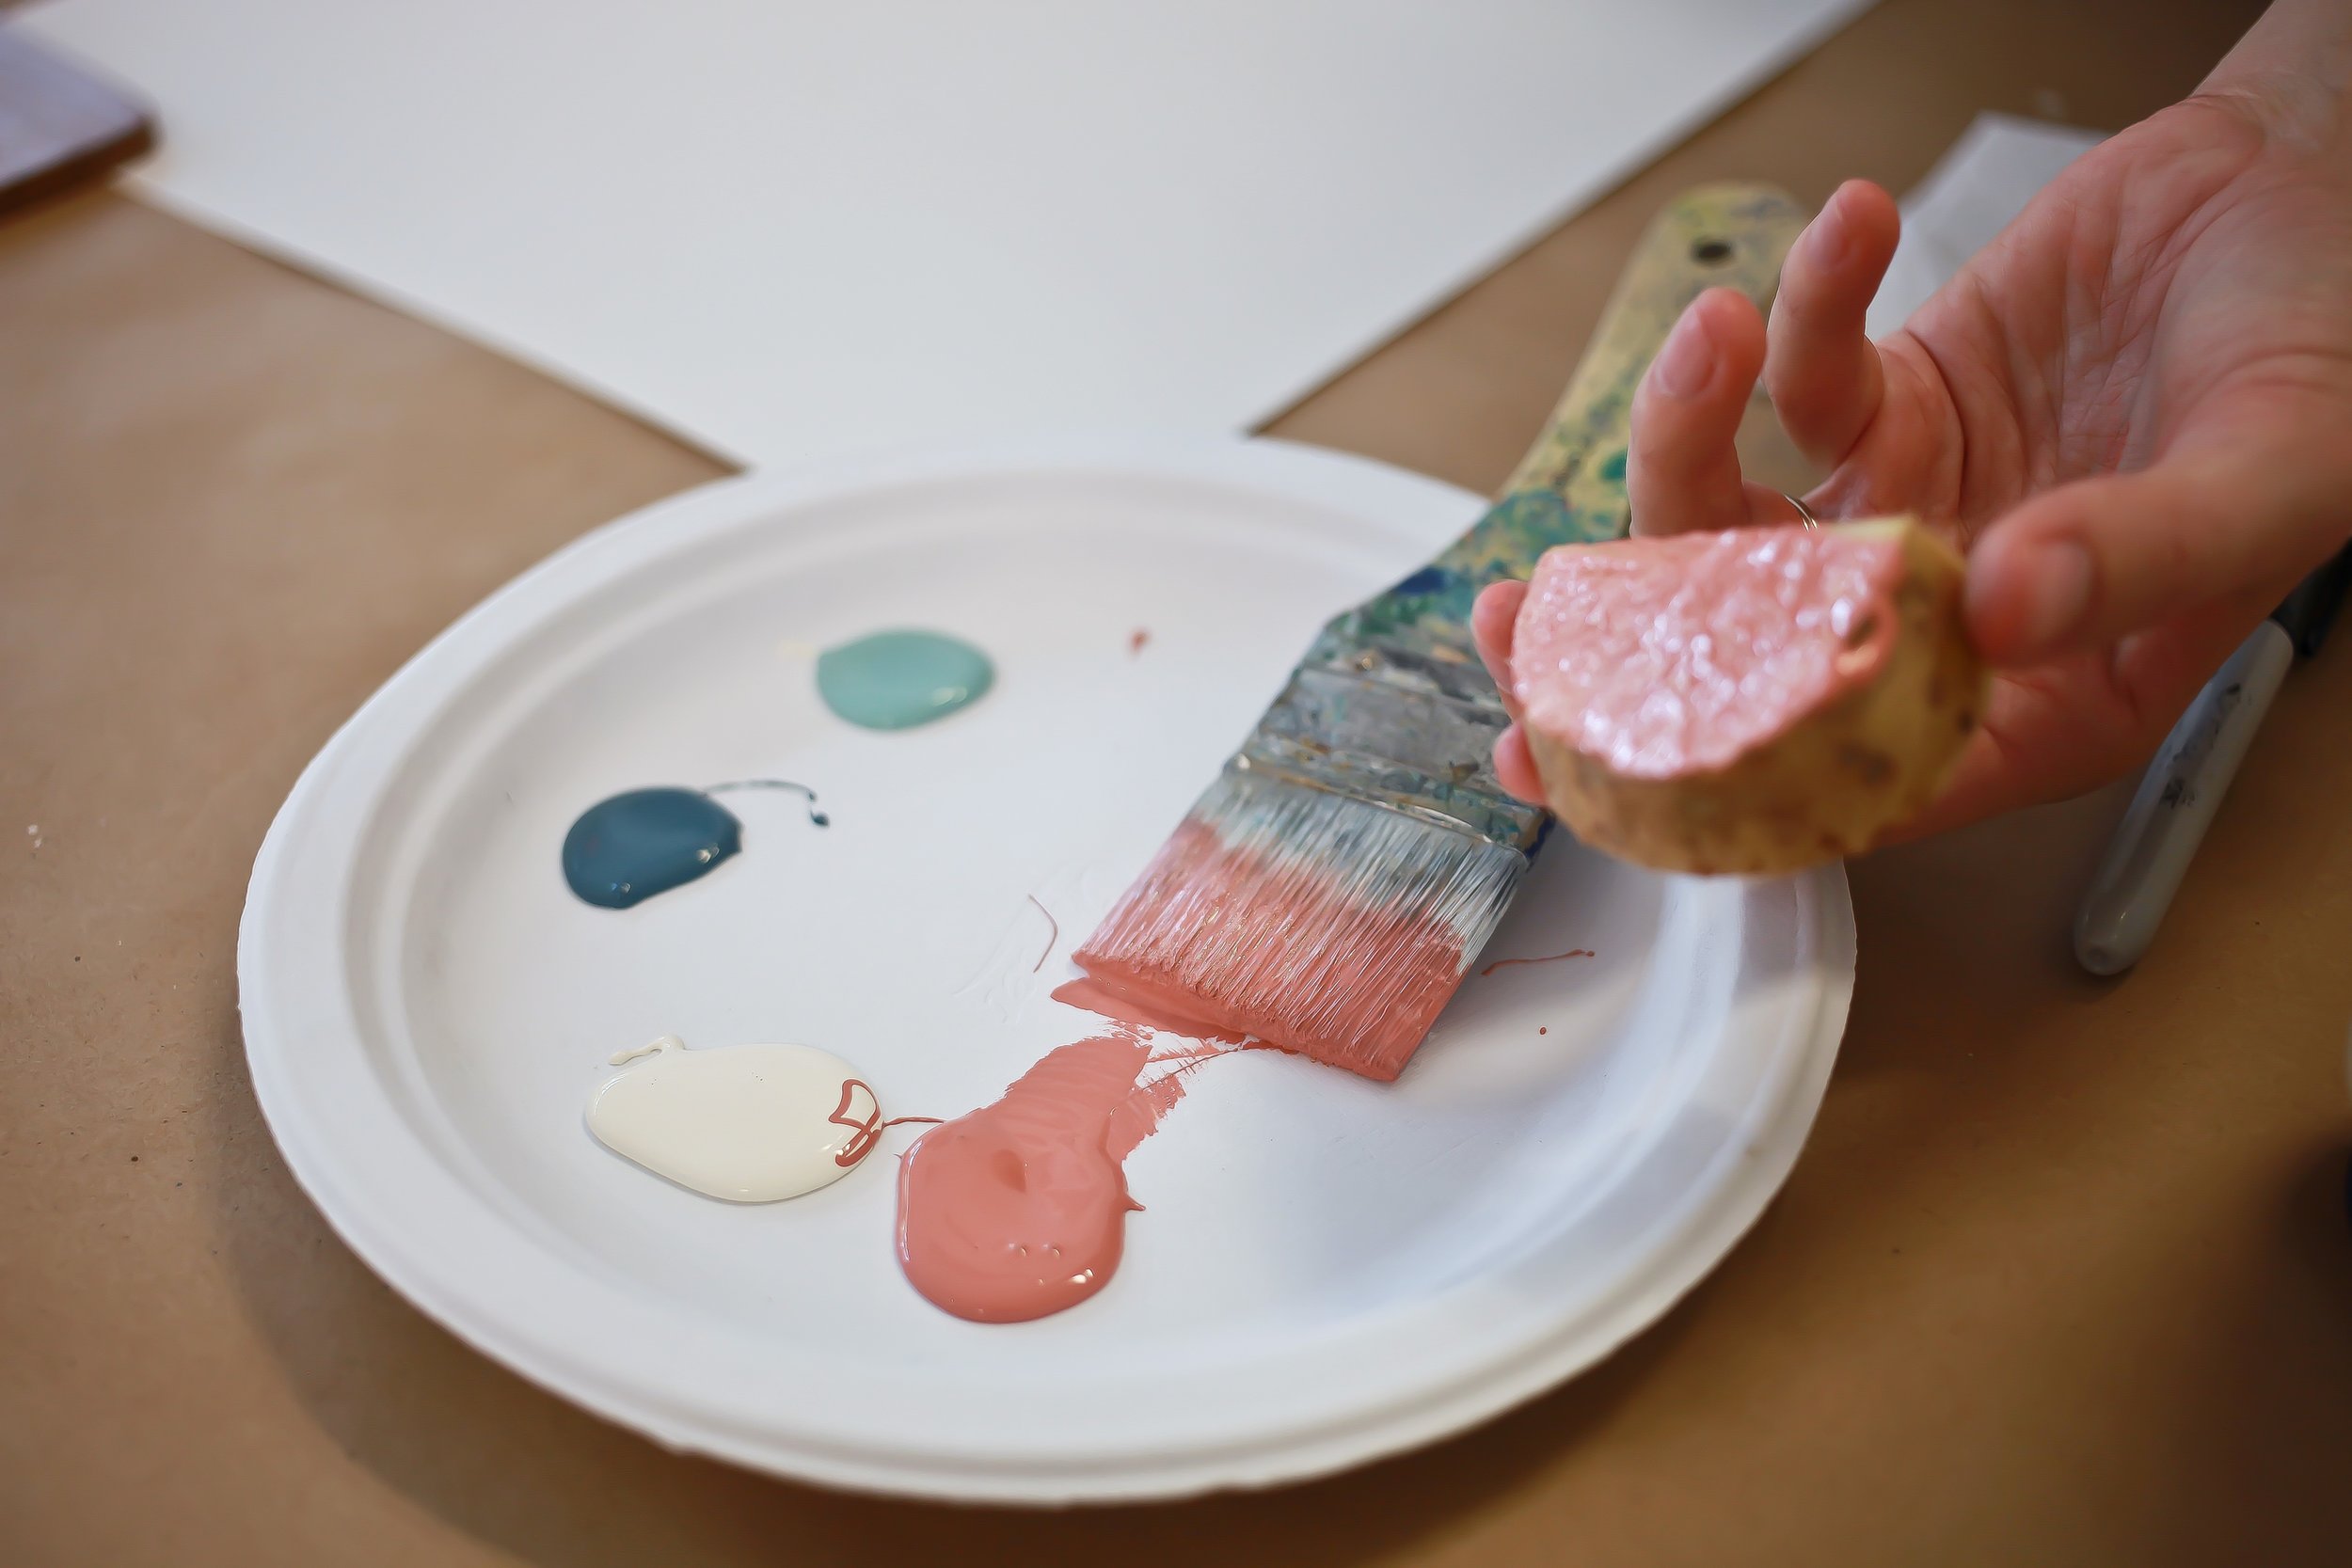
When creating your own potato-print, I would advise using a thick, saturated paint such as acrylic paint or Chalk Paint® by Annie Sloan. These paints will stick well to your produce of choice and do a good job transferring to your backdrop, ensuring the results that you desire. While I have used acrylic in the past and have had success with it, I joined Anna in her studio yesterday to give Chalk Paint® a try. Anna is my good-friend and client who is owner and founder of Hip Innovative Studio Boutique in Newport News, Virginia. Though she has been running businesses alongside of her husband for years, it had always been her dream of one day owning her own studio and boutique, where she could create and sell her line of jewelry along with local and artisan goods. She now does this and more, operating as the area's local Chalk Paint® stockist and offering a variety of creative Workshops. Both being creatives, we thought that it would be fun to team-up together to produce some helpful content for our readers. We were both very pleased with the results of our potato prints using Chalk Paint®. First of all there are so many pre-mixed colors to choose from. We had in mind that we wanted colors that were rich and bright but not too loud, so we ended up using: Aubusson Blue, Scandinavian Pink, Provence, and Old White. Similar to acrylic, Chalk Paint® is very saturated in color so it was fun using the colors individually on some wedges and then blending them on others.
What You'll Need:
1 Potato
Knife + Cutting Board
Paper Plate
Paint Brush
Paper
Some sort of towel of craft paper
Method:
Lay your backdrop sheet of paper on a towel or craft paper.
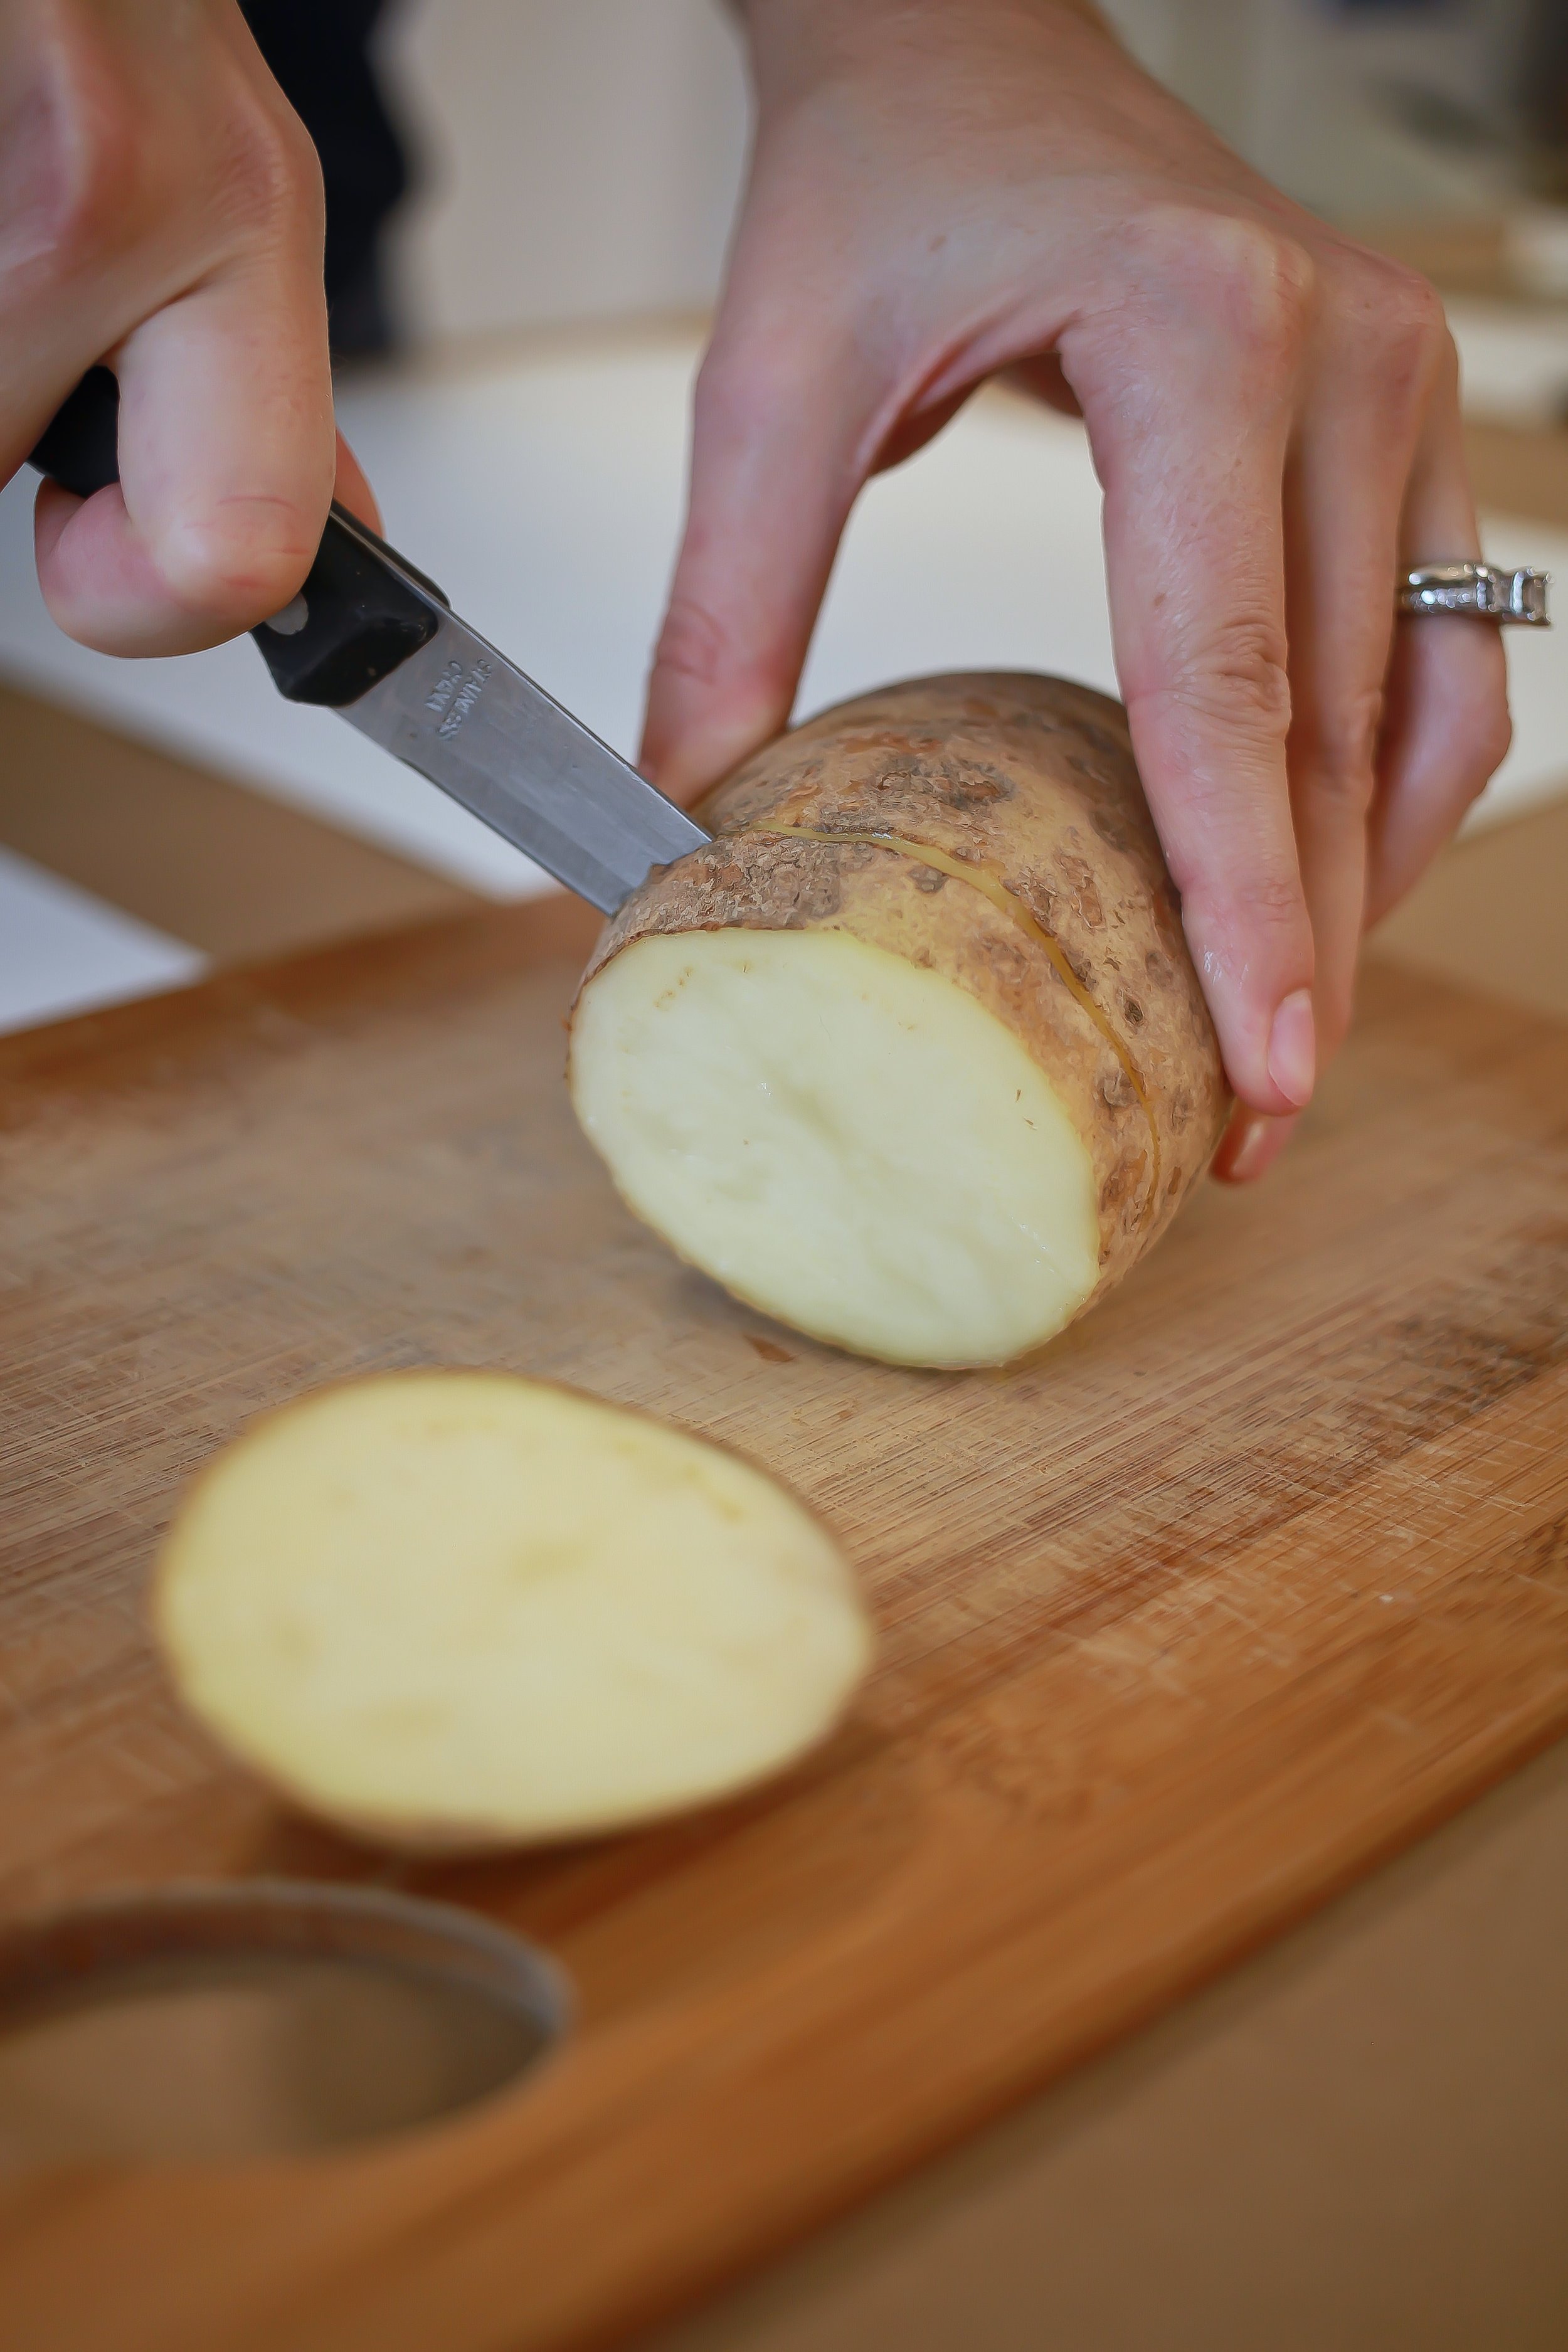
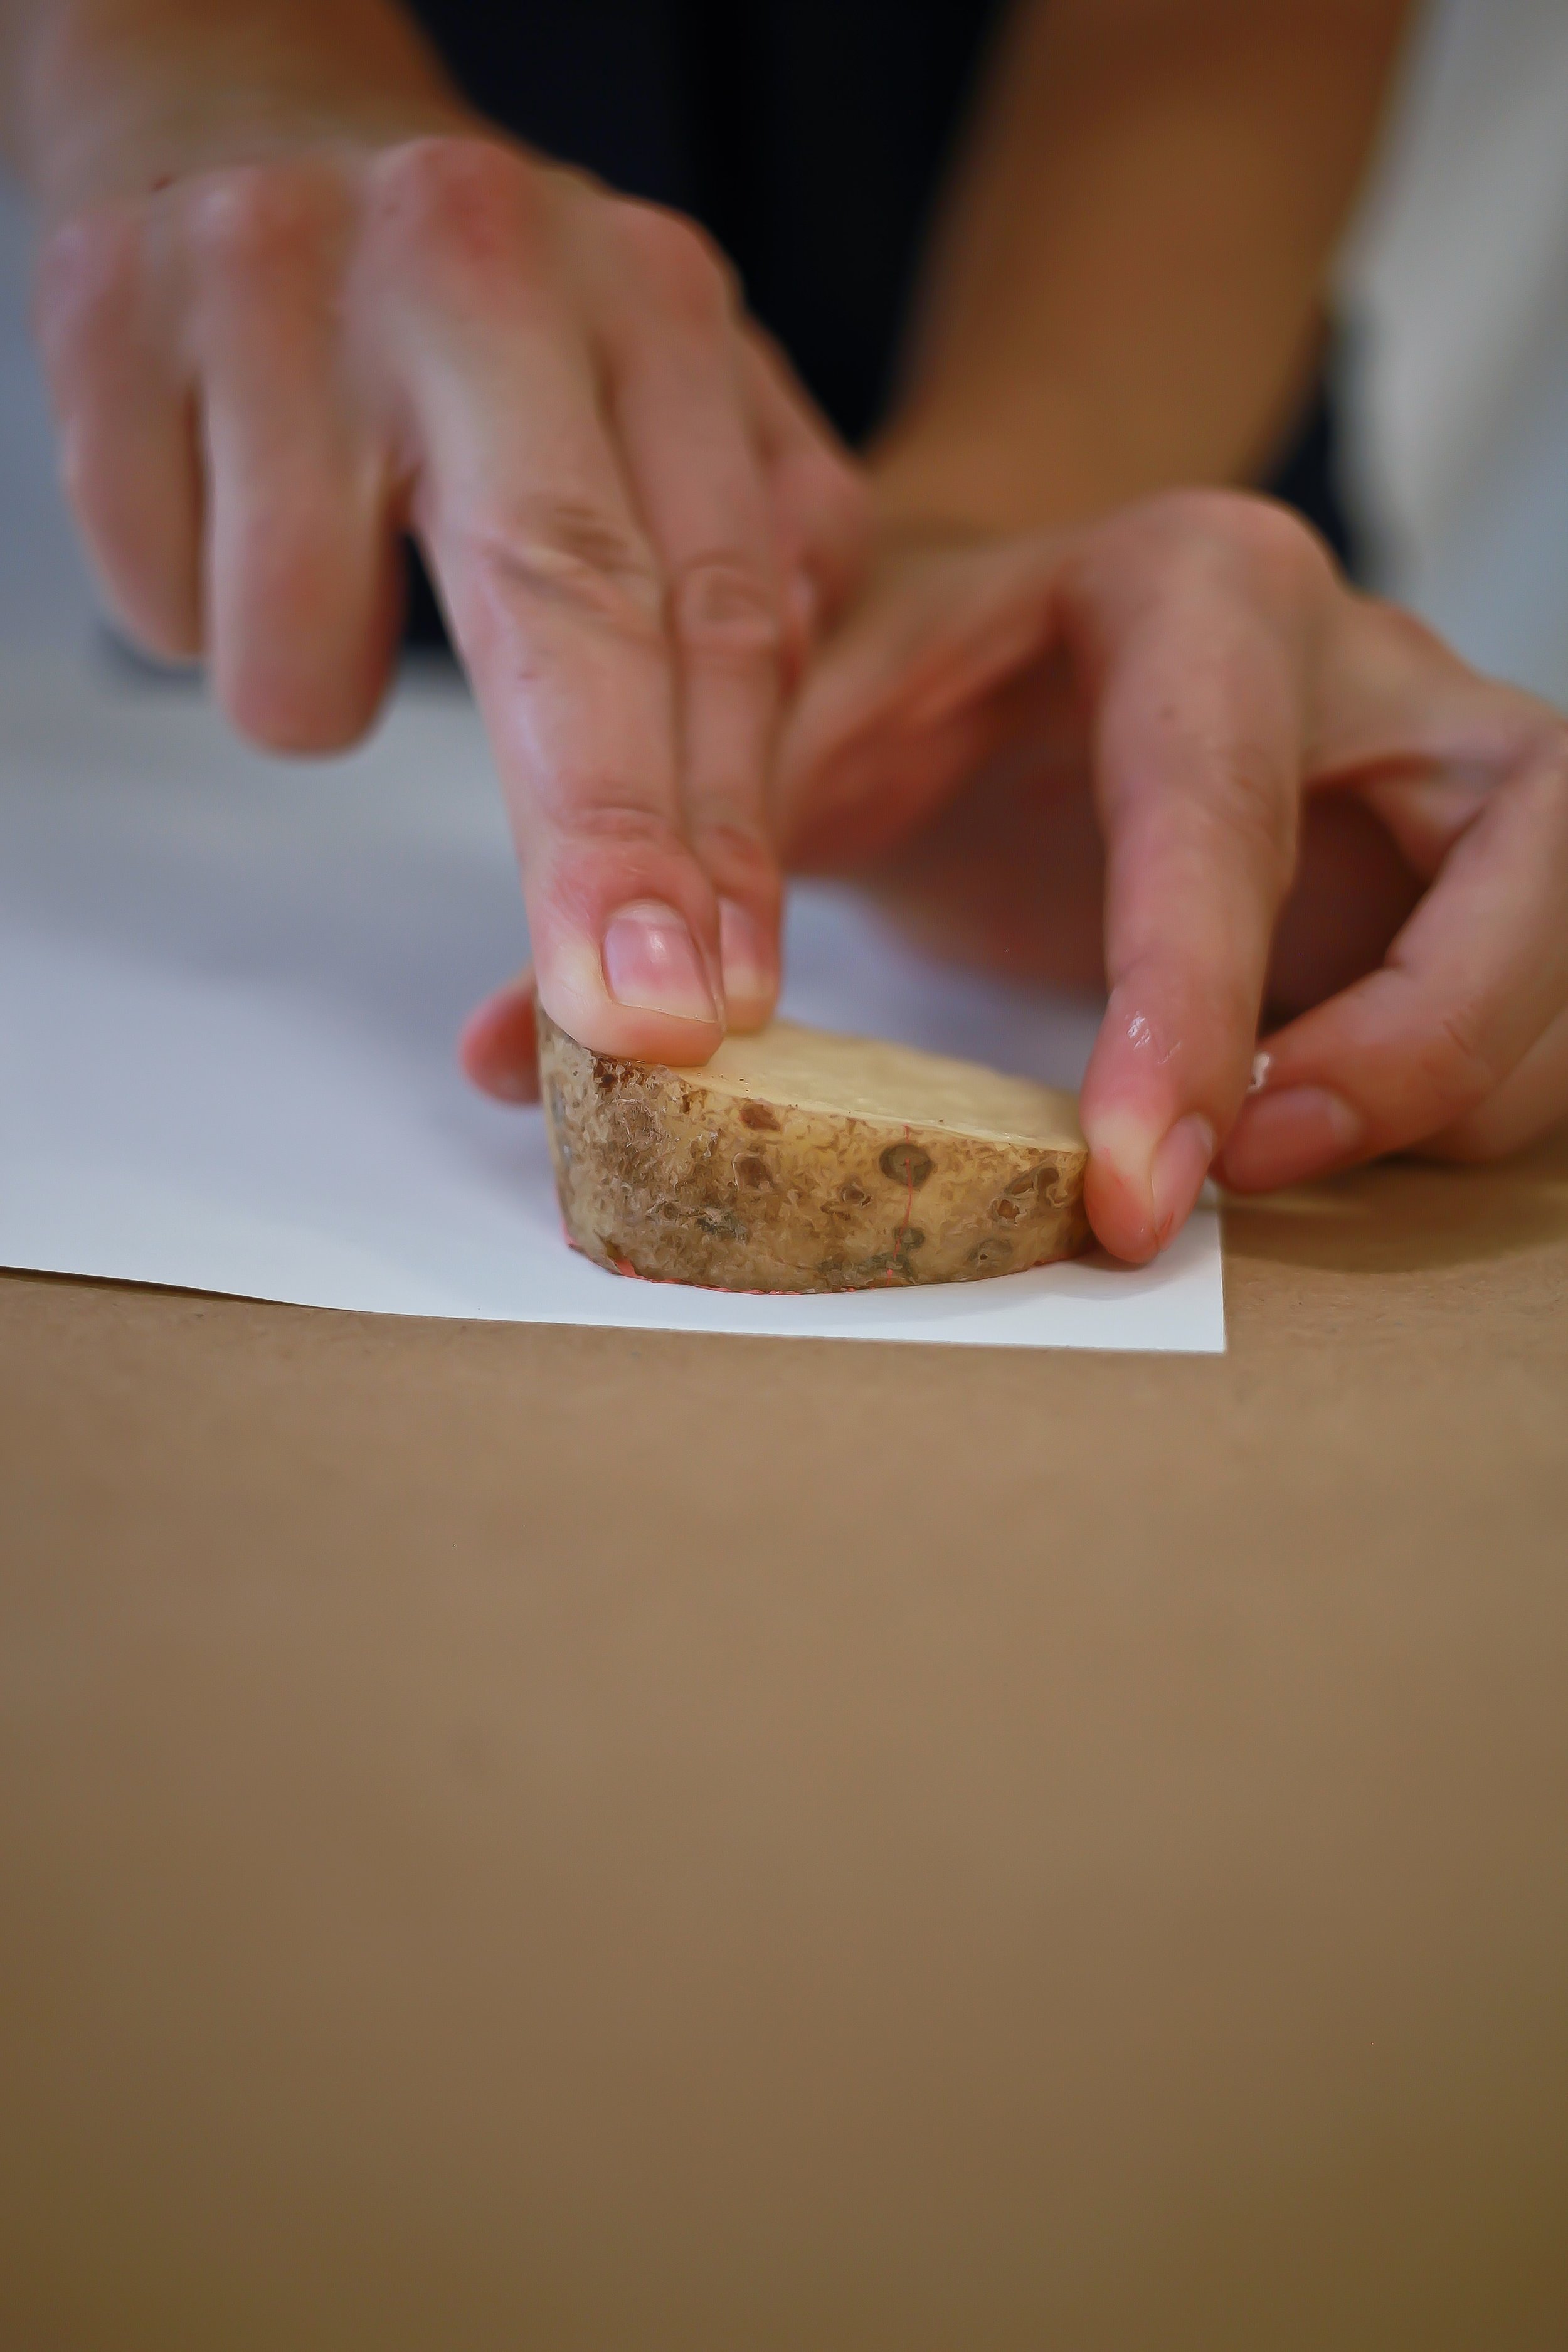
Wash and dry your potato and then slice it on your cutting board. For this example we just used the sliced wedges as is but you can get as creative as you'd like, chiseling in designs like our friend Renea did.
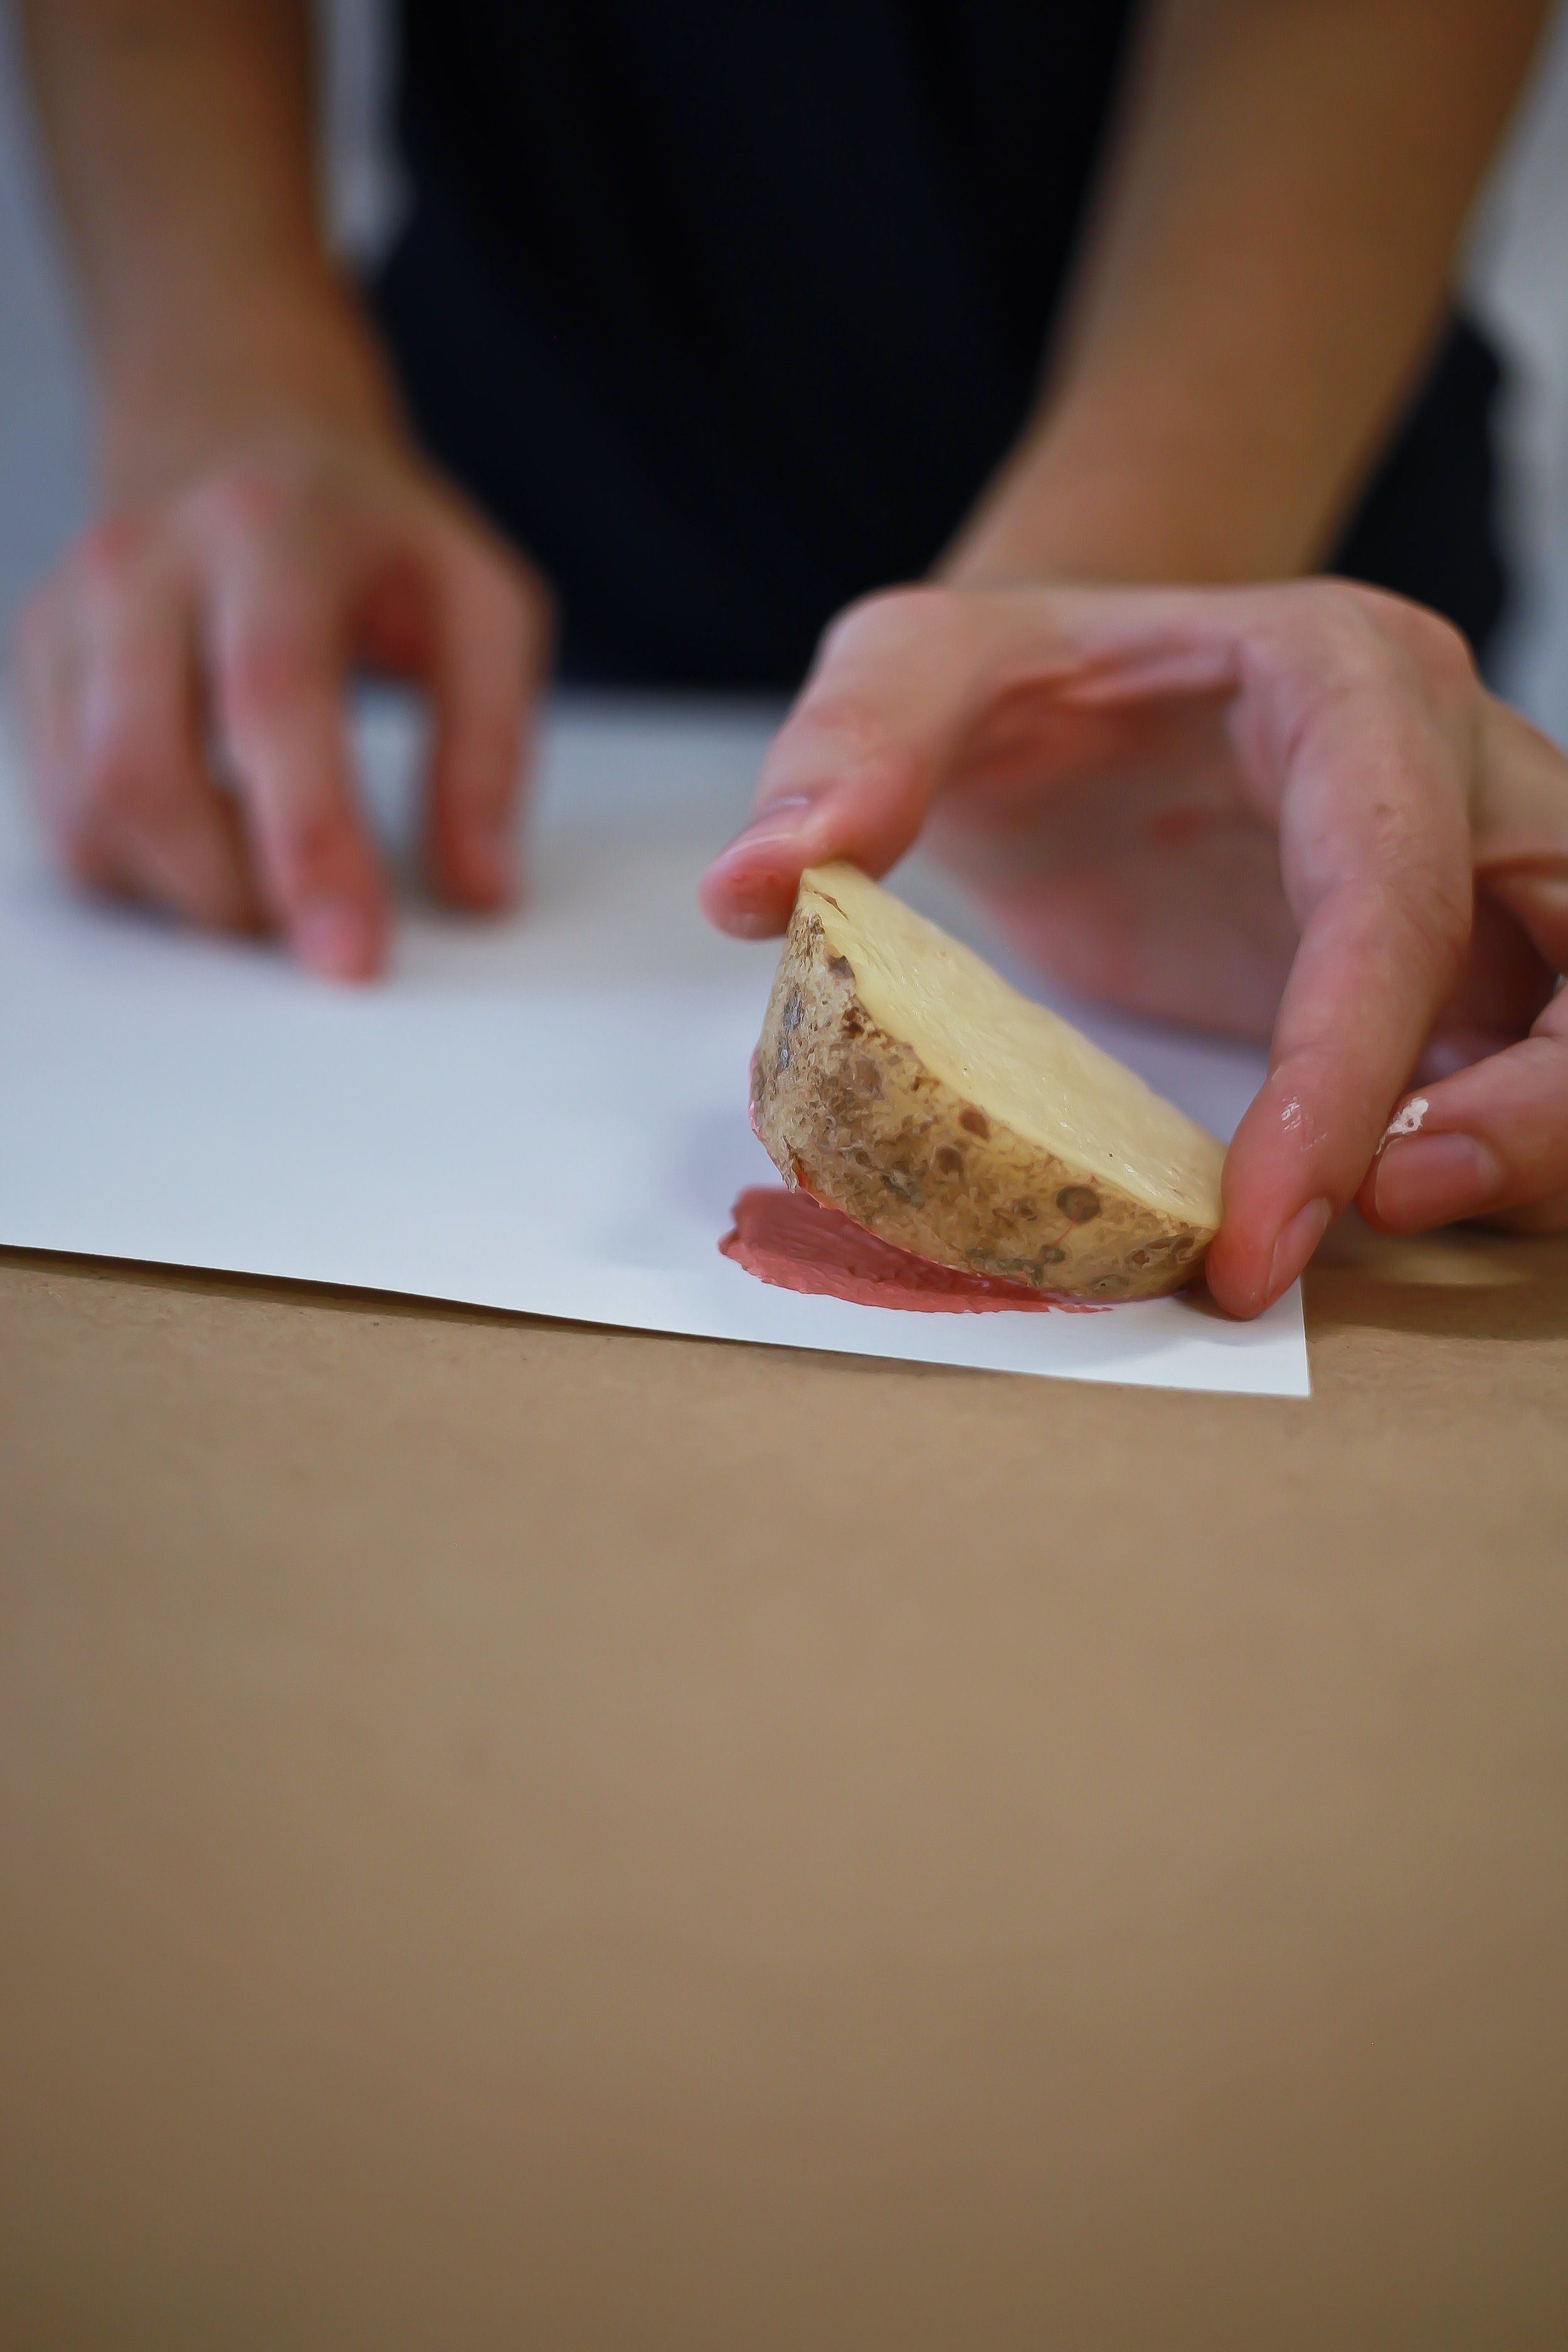
Squeeze some paint on your paper plate and load some onto your brush. Paint one side of your potato wedge.
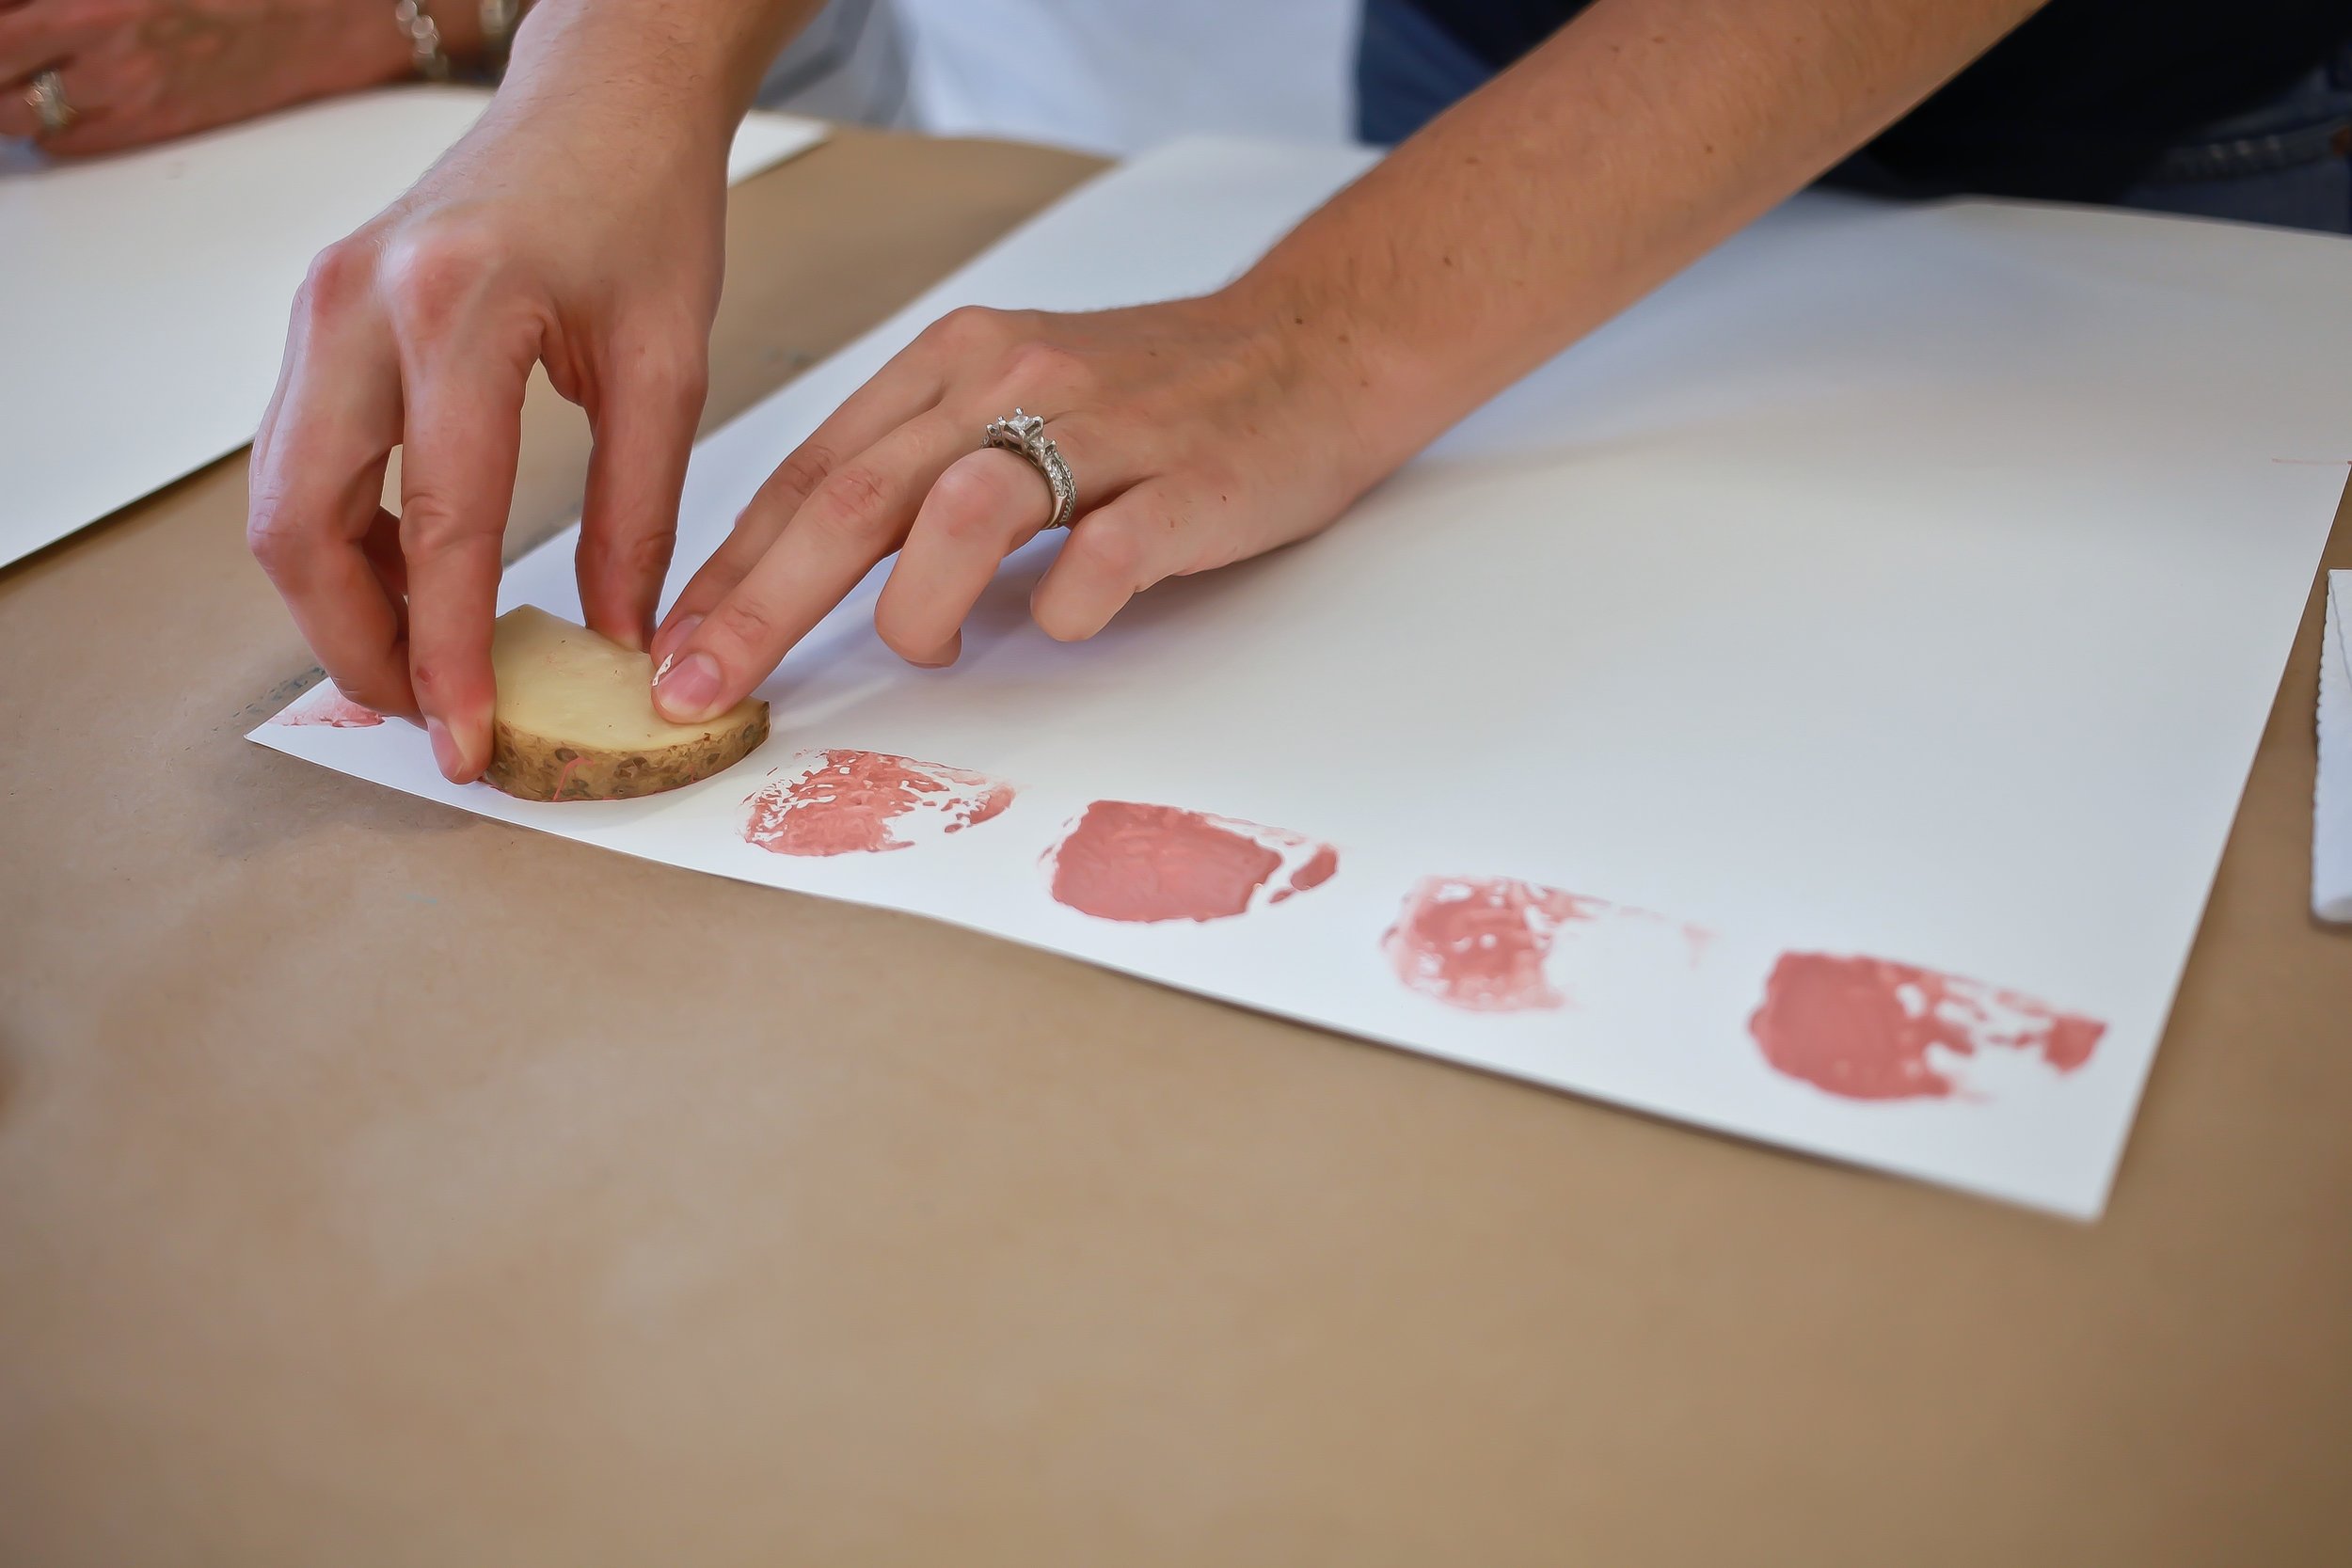
Place your wedge on your backdrop and press down firmly for 2 seconds. Slowly lift your wedge and repeat. The more saturated you would like your design use more paint. You can even add a second color in, like Anna Hubbard and I did here. Your have complete free reign.
Repeat this process until you are finished!
References:
This post was not sponsored but was a collaboration between Anna Eskridge of Making Room for Peace and Anna Hubbard of Hip Innovative Studio Boutique. Photographs by Francesca of Photography on Fire | Styled by Anna Eskridge of Making Room for Peace | Location: Hip Innovative Studio Boutique.
Hip Innovative Studio Boutique is the Williamsburg/Hampton Roads stockist of the internationally acclaimed Chalk Paint® by Annie Sloan. To find a stockist near you, look here.


Something I love is having friends and family over. Whether planned or spontaneous, the door is always open! When Martin told me we had some people coming over last night, I quickly got some things together to make a beautiful, simple meal.